Brigadeiros

I first saw these little gems on an America’s Test Kitchen (ATK) post.  They were just so cute!  Simple, too – just three ingredients + decorating candies (nonpareils)!   In all of the posts I found around the internet, none used vanilla, but they screamed vanilla to me, so mine have four ingredients + nonpareils 🙂   My little brigadeiros are not quite traditional, but they sure are good!

The other thing I noticed is that many of the recipes around the web had very little cocoa.  2 tablespoons, 3 tablespoons.  Ummm.  I guess I’m a chocoholic ’cause that’s not much at all to me.  Eight tablespoons, which is what ATK used did seem a bit much to me so I guess there are even chocolatier chocoholics out there.  I put in 7.  You could get away with 6, but I wouldn’t drop it much more or you may as well scoop the sweetened condensed milk right out of the can and into your mouth 🙂

Something else widely noted was that The United States’ version of sweetened condensed milk isn’t as sweet as that found in Brazil.  wow.  I have a sweet tooth, but I cannot imagine using something even sweeter.  If you’d like, using Nestle’s Quick chocolate drink mix was suggested in several recipes instead of cocoa to make up for the less sweet condensed milk we have.  I did not do this as they are plenty sweet to me.

I also added more butter for a creamier candy, and used natural cocoa instead of Dutch processed, so in the end, I tweaked this quite a bit, but I think you’ll like it.

ok.  enough background info.  Grab a can of sweetened condensed milk, some cocoa powder (regular, natural cocoa, not Dutch processed), some butter, and your vanilla and let’s get to this!

Ingredients:

1 can ( 14 oz, 397 g) sweetened condensed milk (_not_ evaporated milk)

7 tablespoons (40 g) natural cocoa powder (Penzeys is wonderful!)

1/2 stick (2 oz, 57 g) butter

1 tsp (5 ml) vanilla

Directions:

1) Cut up the butter a bit and put it in a small saucepan on medium-low heat along with the condensed milk and cocoa powder.

2) Keep stirring until you think your arm’s going to fall off, occasionally swiping a rubber spatula down the middle to see if it leaves a path.  Once it does, remove the mixture from the heat and stir in the vanilla.  This will take about 15-20 minutes.

3) Pour the mixture into a buttered 8″ x 8″ (20 cm x 20 cm) glass dish and refrigerate for 30 minutes.

4) After 30 minutes, pull it out and scoop the mixture into little balls using either your fingers or a small spoon and your thump to scoop it off.

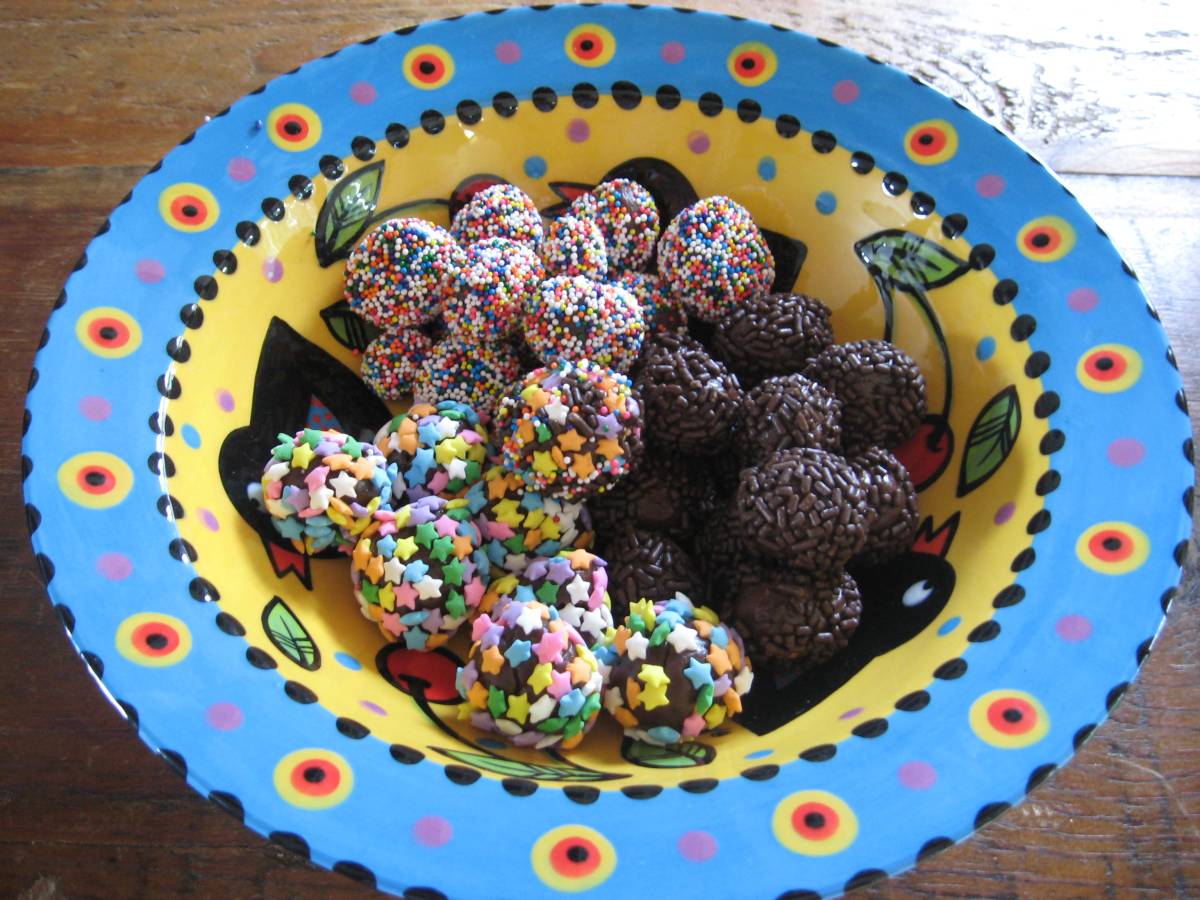
5) Roll into small balls and roll the balls into nonpareils.  You could include various colorful ones and chocolate shot, or a mixture thereof.

Enjoy!

Frosty the Fudgeman

Hi Blog!  I’ve missed you 😦  Let’s make some fudge shall we?  I have a recipe that was handed down from my Grandma to my Mom to me.  I’ve been making it since I was about 9 years old.  It’s quick, easy, creamy, and delicious.  Don’t have a candy thermometer?  No worries; you can still do this.

A word of caution.  While I started making this as a kid, please please please supervise closely if you are allowing your kid to make this.  I recommend making it yourself first, so you know what to expect.  Sugar burns are nasty.  Please be very, very careful. Also note, this pot is heavy when you pour it out; you’re pouring 3-1/2 pounds of fudge. Doesn’t sound like a lot of weight, but it sure feels it when you’re holding the pot in one hand and and scraping it out with the other.  Rest it on a hot mat if you need to.  And if you want seven pounds of fudge?  Don’t double it; make it twice.

Another word of caution.  It’s addictive 🙂

Here’s all you need:

Update: Be sure to check your labels to confirm all items are gluten-free if you are gluten intolerant!

semi-sweet chocolate chips, milk chocolate candy bars (It originally called for three 5-cent Hershey bars.  They’re a bit more expensive now :)), marshmallow creme, evaporated milk, and sugar:

oh, and a marble slab or plastic mold and some butter to coat.  If you don’t have these, then a cookie sheet or regular casserole dish will work just fine.

A candy thermometer will be handy to have, but is not an absolute necessity.  If you don’t have one, grab a clear glass and fill it with ice cold water.

Let’s talk candy cooking stages for a moment.  You’re going to put the milk and sugar into a large sauce pot and cook it for about ten minutes, bringing it to a stage of boiling called “soft ball” stage.  This is because when you drop a bit of this mixture into cold water, it will literally form a soft ball.  It will be 234 F (112 C) on your thermometer.  My thermometer says 240 F (116 C) is soft ball stage.  If yours does, too, ignore it or you’ll have grainy fudge.  Initially the milk and sugar mixture does nothing, and stays that way.  Then all of a sudden it decides it’s time to boil and and will look like this…

And it will rise. Fast.

See how it rose about an inch and is more golden colored?  Once it gets here, it will stay here a few minutes.  Watch the thermometer crepe up.  Again, if you don’t have a thermometer, just test your mixture.  If your water is ice cold and the mixture goes splat, it has not cooked enough.  Wait a minute and try again.  You’ll eventually see it form a ball.  Put your fingers in and feel it; it will be squishy.  If you cook it a bit too long, it will form a hard ball (hard ball stage) and if you cook it a lot too long you’ll eventually reach hard crack stage where the mixture will literally spin a hair in the cold water.  This is peanut brittle, not fudge.

Once you’ve reached softball stage, you simply remove it from the heat, add the chocolates and marshmallow creme, stir and poor onto your slab or into your mold.  I buttered my mold and added confectioner’s sugar for ease of release and to make it look like Frosty 🙂

Stover’s Fudge

Update: Be sure to check your labels to confirm all items are gluten-free if you are gluten intolerant!

4-1/2 c. (855 g) white sugar

1 lg can (12 oz, 359 ml) evaporated milk     [_not_ sweetened condensed milk]

1 lg package (12 oz, 340 g) semi-sweet chocolate chips

3 milk chocolate bars [1.55 oz. (44 g) each for a total of 4.65 oz (132 g)]

1 jar marshmallow creme (7 oz, 198 g)

2 c. nuts, optional

Cook sugar and milk together until soft ball stage. (See notes above recipe for candy stages.)  Stir constantly or it will stick.  Remove from fire.  Add marshmallow creme, chocolate chips, chocolate bars, and nuts (if using).  Mix well and poor into buttered dishes.  Cool.

This cools really fast when you pour it onto a cool surface so don’t worry about it running over the edge of the slab.

To serve, I cut pieces as needed.  If you cut it in advance they’ll dry out.  For gift giving, cut off small sections and wrap in plastic wrap.

Enjoy!

%d bloggers like this: