Forget Me Nots

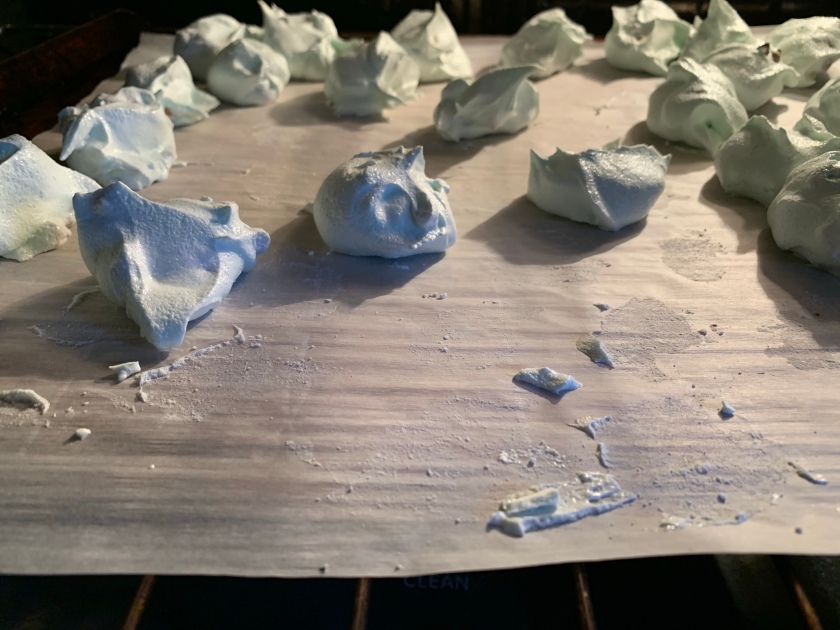
I baked them overnight, when everyone had supposedly gone to bed. This is what I found in the morning…

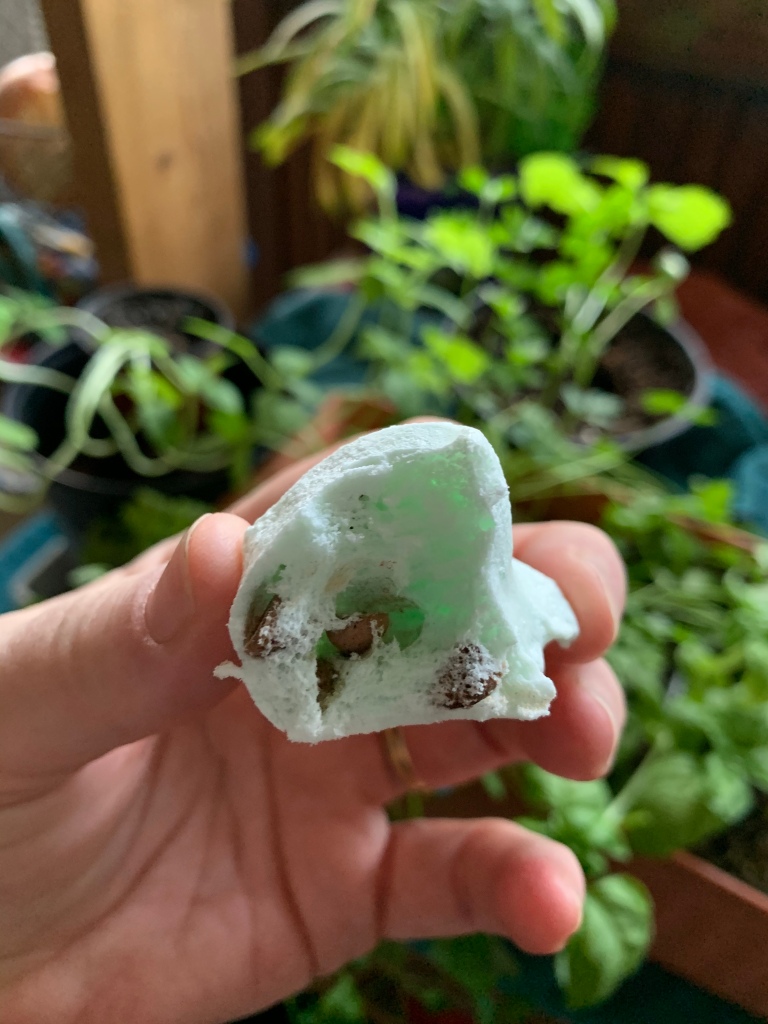
These cookies are truly appropriately named. When I make these minty, crunchy on the outside, chewy on in the inside puffs of delicious minty goodness with mini chocolate chips inside, they are not forgotten. The kids find them and poof! gone.

Note in the caption above these aren’t quick to make. Depending on temperature, they take 1.5 to 5 hrs or more. The original recipe for these came from my grandma and she always left them in the oven overnight, at least 5 hours. You don’t actually leave the oven on overnight tho; you preheat it, put the cookies in, and turn it off.

If you’re a total chocoholic, you could take these and dip them in melted chocolate when they’re done, either using “melting chocolate” from the store, or by taking a package of chocolate chips and melting 3/4 of it with about 1 T shortening, then adding in the rest of the chocolate chips and stirring ’til melted.

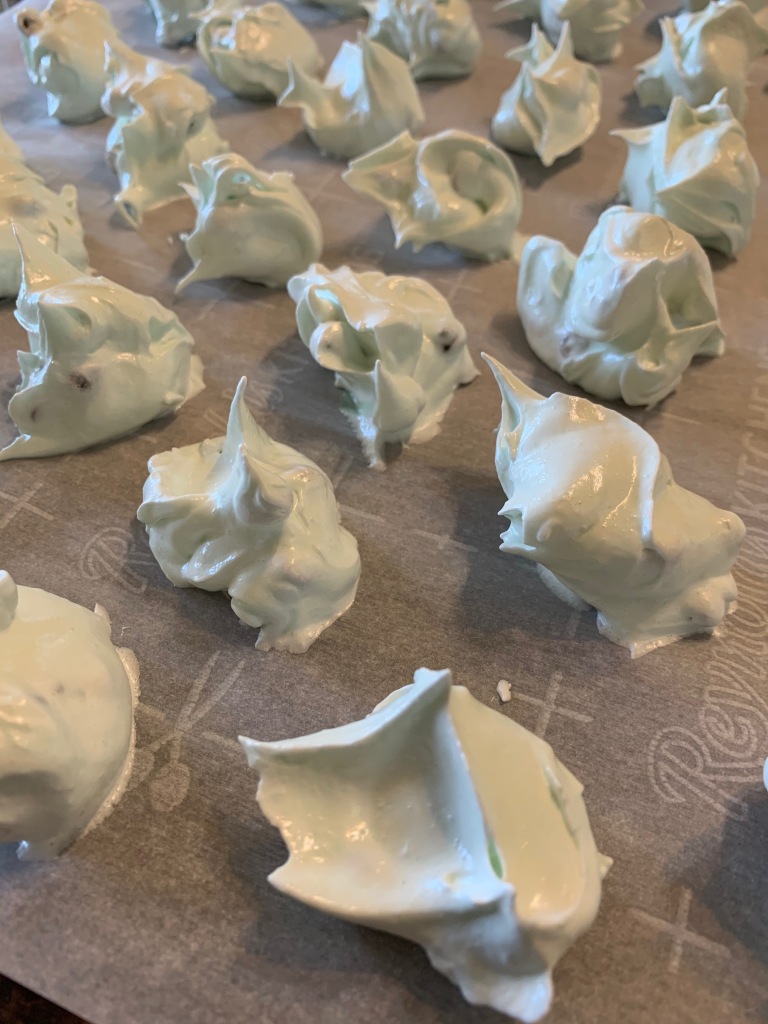
Remember when beating the egg whites to beat them until stiff. The little tips shouldn’t curl over. If you watch The Great British Baking Show (or in the UK, The Great British Bake Off), you’ll see contestants hold their bowl of egg whites over their head to test if they’re stiff. Don’t overbeat them tho; they should remain glossy looking, not dry. Once you’re noticing they’re almost there, it’s probably only a minute or 2 more.
Ingredients

  • 2 egg whites from large eggs
  • 1/2 tsp cream of tartar
  • dash salt
  • 3/4 c. (150 g) white, granulated, sugar (not confectioner’s)
  • 1/2 tsp vanilla extract (Make sure it’s gluten-free, corn-free, etc. See Note below.)
  • 1 tsp green creme de menthe or 1/4-1/2 tsp mint extract and a few drops of green food coloring
  • About 1/2-3/4 pkg Enjoy Life miniature chocolate chips, to taste

Note on vanilla extract: I make my own or use one by McCormick that no longer has corn syrup. To make my own, I heat 1 c. (about 235 g or ml) potato vodka and put it in a bottle, then add 8 split vanilla beans. You can use your choice of spirits; from what I understand, many work. After it’s cooled, I add another cup of potato vodka, cap it off, and wait. Shake lightly periodically, and leave it for a couple of months. So delicious…

Directions

  1. Preheat oven to 350 F (180 C); place oven rack in the middle. (See note below for getting these done more quickly.)
  2. Line a large cookie sheet with parchment paper.
  3. Prep ingredients, breaking egg whites into a mixing bowl and having everything else measured and at the ready.
  4. Beat egg whites a minute or so on medium speed, then add cream of tartar and a dash of salt. (If you have a KitchenAid mixer, use the wire whisk, speed 3 or 4 to start.)
  5. Continue beating egg whites until stiff. (Increase mixer speed to medium high, and then high. On the KitchenAid, it would be speed 6 for most of the time, ending on 8.)
  6. SLOWLY add sugar. Keeping my mixer at medium speed (4), I just tilt my bowl with sugar on the mixing bowl and keep it in a thin stream until empty; many put the sugar in 1 Tbsp at a time until they’ve added it all.
  7. Add vanilla and creme de menthe; mix briefly until incorporated.
  8. Fold in mini chocolate chips. (I use the wire whisk on the lowest speed on the mixer.)
  9. Dip out onto lined cookie sheet using a metal spoon (I just use a cereal spoon.) or you can get fancy and pipe it out into fun shapes.
  10. Place in the oven and turn the oven off.
  11. Leave 5+ hours without opening the oven door.
  12. Enjoy!

Note on speeding these up: You can use the lowest temperature of the oven and leave on for about 1.5 hrs. Watch carefully tho; you don’t want browned cookies (tho they’ll probably still get ate with joy :). I’ve even played around with leaving at 350 F a few minutes, then turning it down around 270 F (130 C) for 30 minutes, and then down all the way to try and speed them up more. They definitely do best with the 1.5 or 5 hr version tho. If you’ve planned them out, do the 5 hr; then they’re just fix them and forget them if you can 🙂
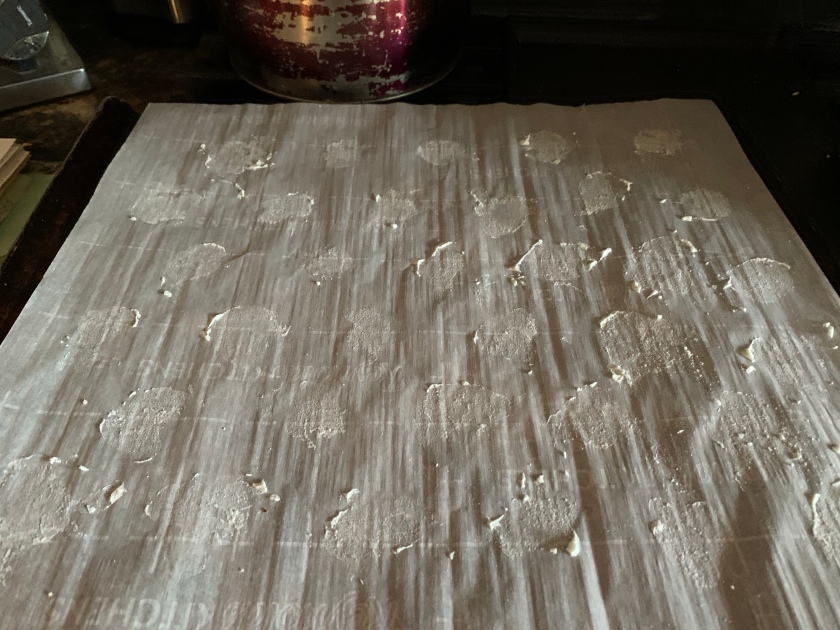
All gone!

Gone, but not forgotten…
Chile Rellenos Casserole – Gluten Free and Dairy Free

First, “chile”, “chili”, or “chilli” – are all basically the same, just vary in use by location, hence the reason I’m always confused as to which to use. I’ve lived in the southwest where “chile” is used most of the time and in other parts of the states where “chili” is usually used. I already have this recipe (with full-on wheat and dairy) as one of the first recipes on this blog, but called it Chili Rellenos Casserole and I’m just gonna leave it that way. If you can have and want the wheat and dairy, feel free to pop over to that one. If not, read on for one made with eggs, gluten-free flour and Daiya dairy-free cheese shreds. (It’s just as good!) I also make my own tomato sauce, but you can absolutely use something like Muir Glenn pizza sauce (yum!).

This recipe is super forgiving. Only have 3/4 of a can of tomato paste for the sauce? That’s ok. Put in too much flour accidentally? (oops) That’s ok, too (phew!); just add another egg to compensate. Forget that you’re out of the flour you want for the recipe, but have already cracked the eggs? A rough mix of 1/2 non-starchy flours (e.g., rice flours) and 1/2 starchy flours (e.g., tapioca starch) should work.

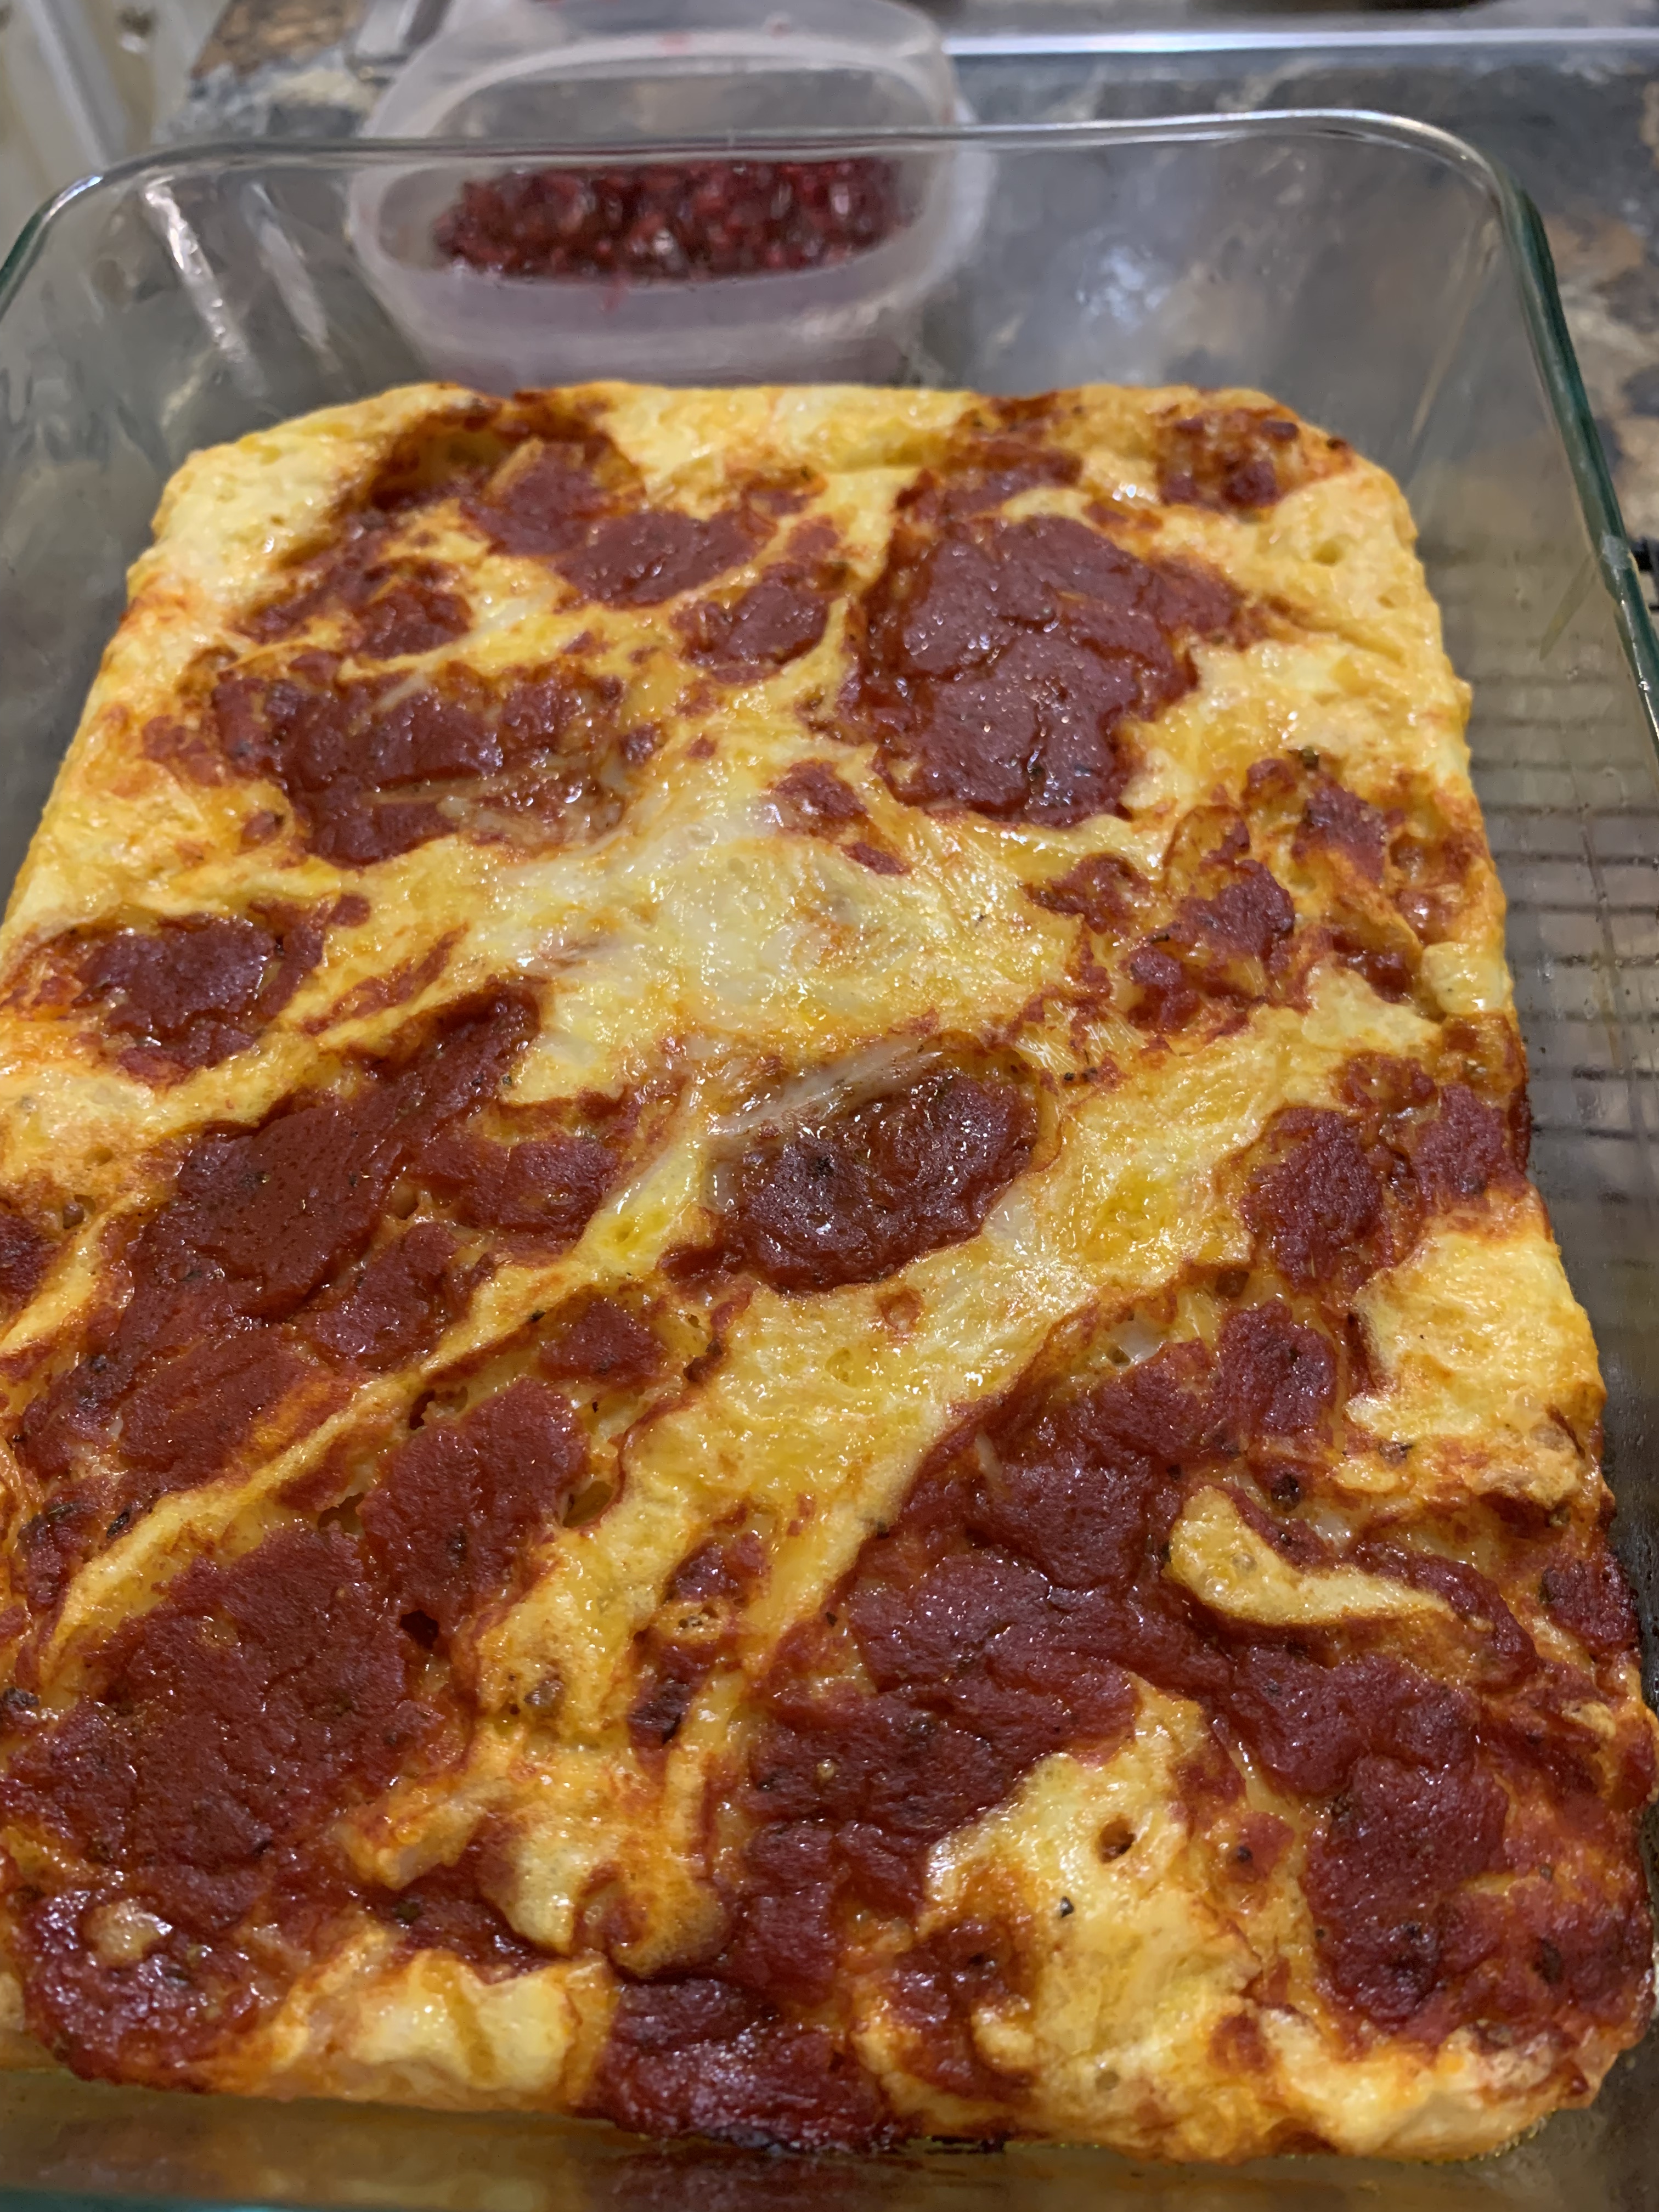
It’s also super tasty 🙂 When I make this, I use two rectangular dishes now [2.75 Qt (2.6 L), 9.5″ x 7.5″ at the top] because I make one with the chiles, and one without. Both are very popular and there are no leftovers.

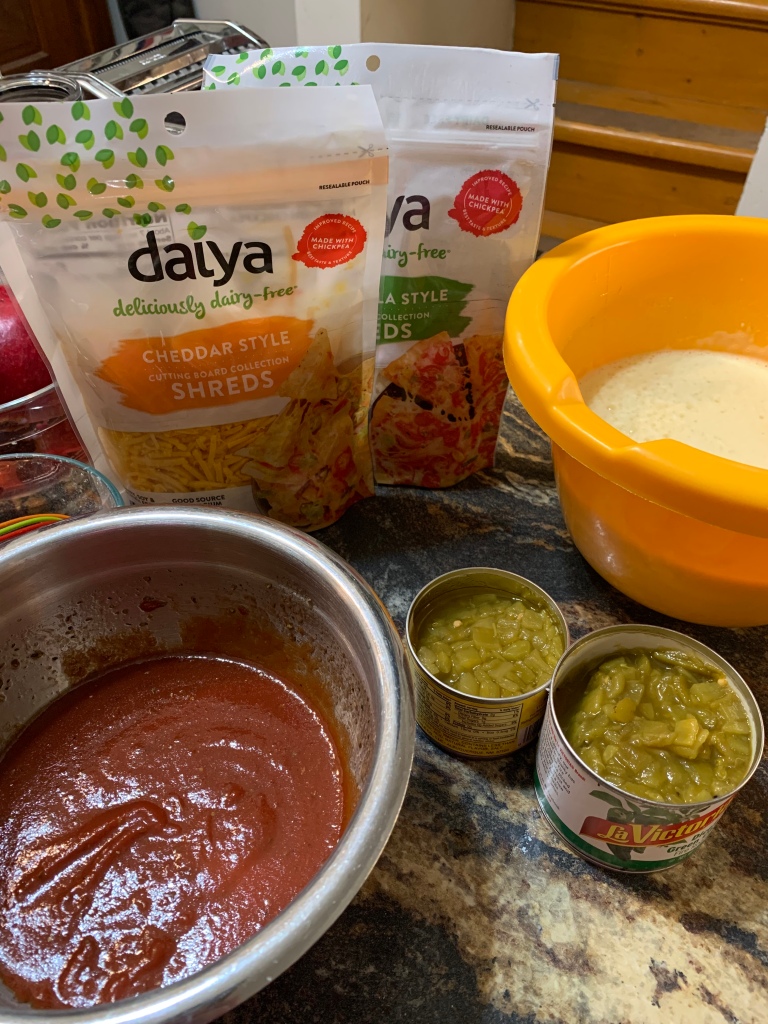
Make sure to gather everything up (mise en place – “everything in it’s place”) and let’s get started…

I’ve already mixed the eggs, milk, and flour here.

Ingredients

  • 8 large eggs (455 g)
  • 2 c (480 g or ml) unsweetened almond milk
  • 1 c (150 g) Bob’s Red Mill 1-to-1 Baking Flour (blue bag; technically it’s 148 g, but 150 g is what I do)
  • 1 bag (200 g, 7.1 oz) Daiya cheddar cheese shreds
  • 1 bag (200 g, 7.1 oz) Daiya mozzarella cheese shreds (or use Daiya pepper-jack shreds for more kick)
  • About 2 c (425 g, 16 oz) your choice of tomato/pizza sauce (Muir Glen pizza sauce is great or make your own – See note below.)

Sauce: Wow. I gotta say after looking around on All Recipes at pizza sauce recipes that people there are way overcomplicating this. There’s no need to cook it and no need for a lot of different ingredients. This is what I do and it’s the same sauce I use when I make pizza: I use 1 can (6 oz, 170 g) tomato paste, about 2 Tbls extra virgin olive oil, about 1.5 c (360 g or ml) water (don’t add all at once), dried oregano (couple teaspoons?), dried mince garlic (sprinkle generously), and some Penzey’s pizza seasoning if I have it on hand, with the key ingredient there being dried fennel. Whisk together as you add each ingredient. When whisking in the water, do so gradually. It will mix better and you can watch for the right consistency. All the herbs can be mixed in at once. You could add a teaspoon of sugar to cut the acid from the tomatoes, but there’s really no need to for this; there’s plenty of water to dilute the acid. Sorry for the lack of definition here; I don’t measure anything for this and I mix and add ’til the taste (tomato-y and herby, but not gritty), thickness (slightly thick, not watery), and look (fluffy and glossy) are how I like them.

Directions

  1. Preheat oven to 375 F (190 C).
  2. Butter 2 rectangular dishes w/dairy-free butter [2.75 Qt (2.6 L), 9.5″ x 7.5″ at the top]. If you only want a dish with chiles, you can use a 9″ x 9″ dish, but remember it will be thicker so cook at 350 F (180 C) for about an hour.
  3. Mix together eggs, milk, and flour. An immersion blender works nicely for this if you have one. You could also just put it all in a blender.
  4. If making your own tomato sauce, do that. (See note above.)
  5. Layer in dishes as follows, except remember to leave off the chiles and spicy cheese in one of the dishes if you’d like. I usually have some leftover cheese, using most, but not all of both bags:
    1. egg mixture
    2. cheeses
    3. chiles
    4. egg mixture
    5. cheeses
    6. chiles
    7. dollop on tomato sauce
  6. Bake for about 40 minutes or until done. It should look poofy and will bounce back if you touch it lightly in the middle. It will flatten a bit upon cooling.
  7. Cool a few minutes as it will be very hot.
  8. Enjoy!
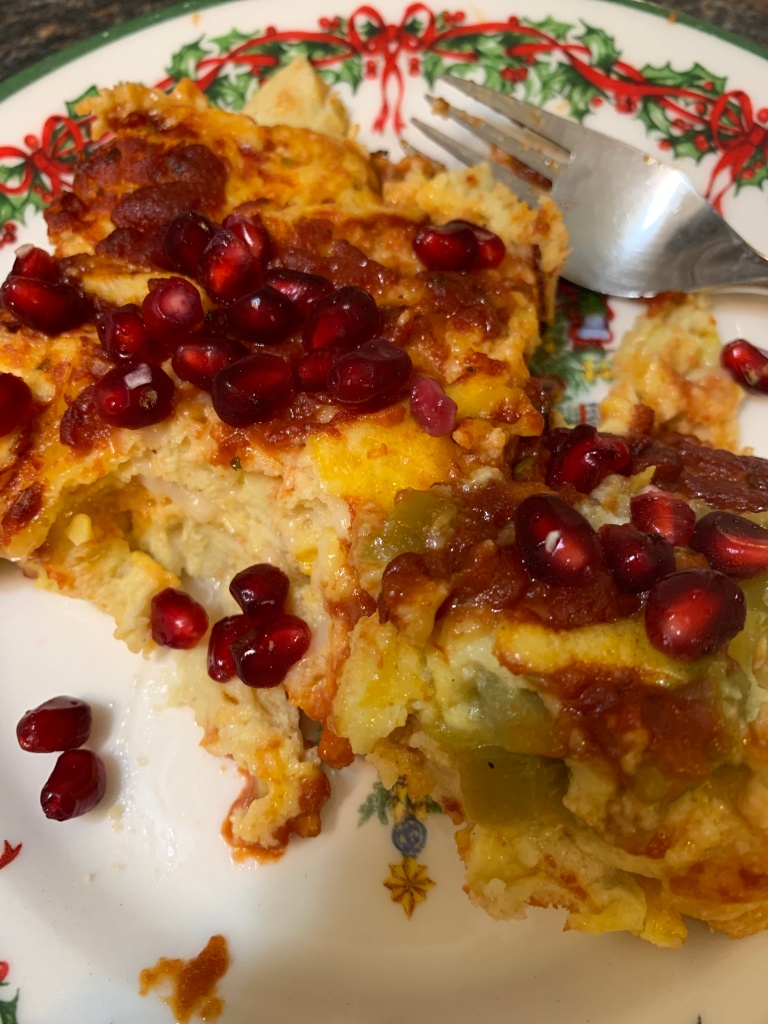
Some of both, with pomegranate seeds on top 🙂

Cinnamon Roll Pecans

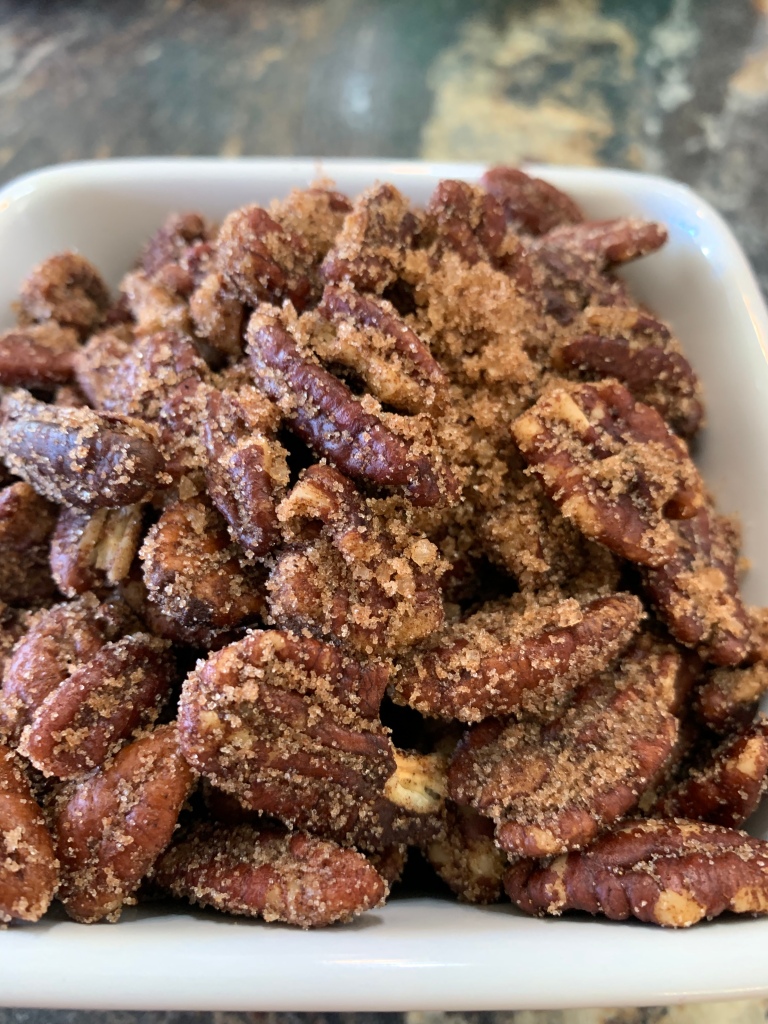
As winter and winter holidays come upon us, the time for having handy snacks and appetizers is here. One of my sons popped out of the shower this morning to ask if he smelled cinnamon rolls. Nope, these were pecans with a light glaze and lovely cinnamon roll spices.

This recipe was inspired by a recipe at cooksillustrated.com for warm-spiced pecans with rum glaze; however, I wanted something a little easier with measurements (anyone have an 1/8th teaspoon measure?), a little easier with timing, and a little more like cinnamon roll filling flavor, with no rum. Rum is great in hot-buttered rums, but not on pecans. It’s not a flavor my kids really like.

These are really simple to make:

  1. Roast the pecans
  2. Prep the spice mix
  3. Prep the glaze
  4. Put pecans in the glaze, and then the mix.

A little side note – I was curious as to the difference between roasting and baking since these are solid, like a meat or veg, but lower temperature. It seems that most agree that roasting is high heat (400+ F), and usually done on something that is solid like meat or veg and baking is lower heat (375 F or lower), not an open flame, and for making cookies and cakes. Most people don’t bake at say, 390 F so I’ll ignore the numbers in between at the moment 🙂 These nuts don’t really fit either, but I think they’re closer to roasting because they already have a shape; it’s not transforming a batter or dough into a new shape with baking.

Back to the nuts; they’re waiting…

Ingredients

2 c. (8 oz, 225 g) raw pecans

Warm spice mix

  • 2 Tbsp sugar
  • 3/4 tsp kosher or coarse salt
  • 1/2 tsp ground cinnamon
  • 1/4 tsp ground cloves
  • 1/4 tsp ground allspice

Glaze

  • 2 tsp vanilla extract
  • 1 tsp brown sugar (dark or light is fine)
  • 1 Tbsp soy-free Earth Balance (or butter if you can have that, or whatever butter substitute you use)

Directions

  1. Preheat the oven to 350 F (180 C), rack in the middle position.
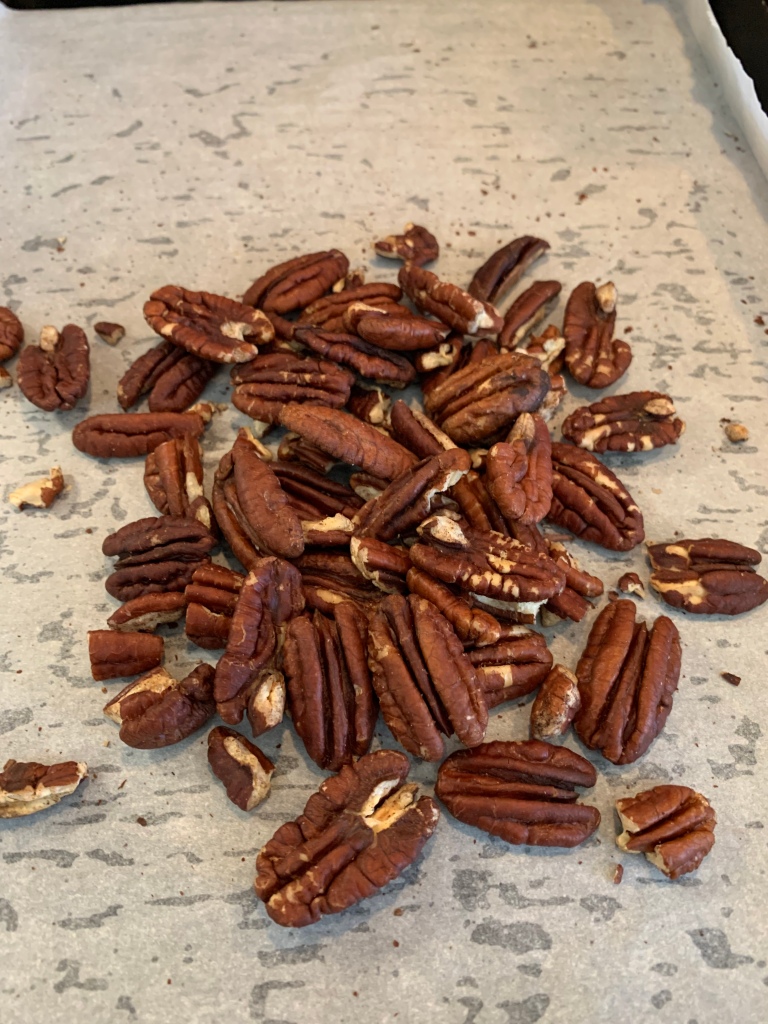
  2. Line a griddle pan or cookie sheet with parchment and pour nuts in an even layer onto the pan.
  3. Bake 5 min, stir, and bake 5 min more. The nuts should be slightly darker than originally and have a nutty aroma.
  4. Let the nuts cool a bit while you prep:
    • mix together the warm spice mix ingredients in a bowl
    • melt butter with brown sugar in a saucepan (or microwave together); then add the vanilla.
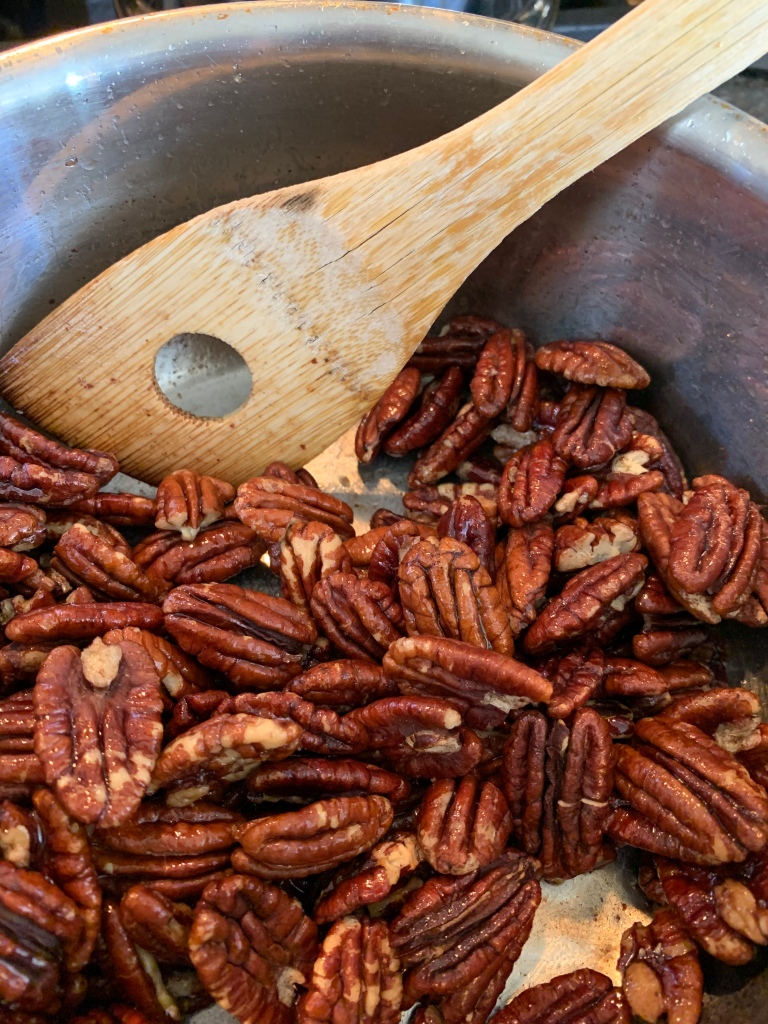
  5. Add the nuts to the hot glaze; mix together.
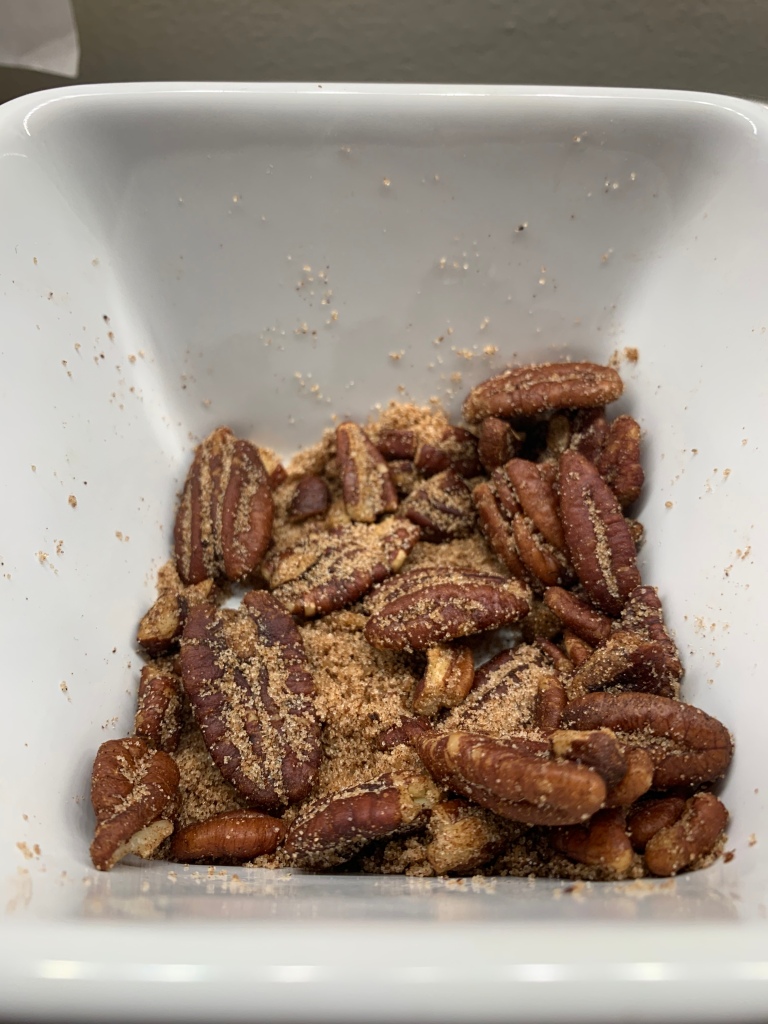
  6. Add the now-glazed nuts to the spice mix; mix together.
  7. Enjoy!

Notes

For steps 4-6, you have the option of prepping so you can move the nuts from one station to the next or prepping in 2 small bowls and just have a different bowl ready for the nuts. I do the former, using bowls big enough to just move nuts from one station to the next.

If you don’t have an oven thermometer, I highly recommend getting one. It could make the difference between browned nuts and burnt ones. Also, get to know your oven and calibrate it if possible. If not, don’t worry about it, just use an oven thermometer to learn your oven’s behavior. For example, I have to keep an eye on my oven thermometer for longer bakes because it’s erratic and will go 50+ degrees higher than what it’s set for, but for short bakes, if I want 350 F, I preheat it to 325 F.

And don’t wait too long to have some. They disappear fast…

Practically Perfect Pumpkin Muffins

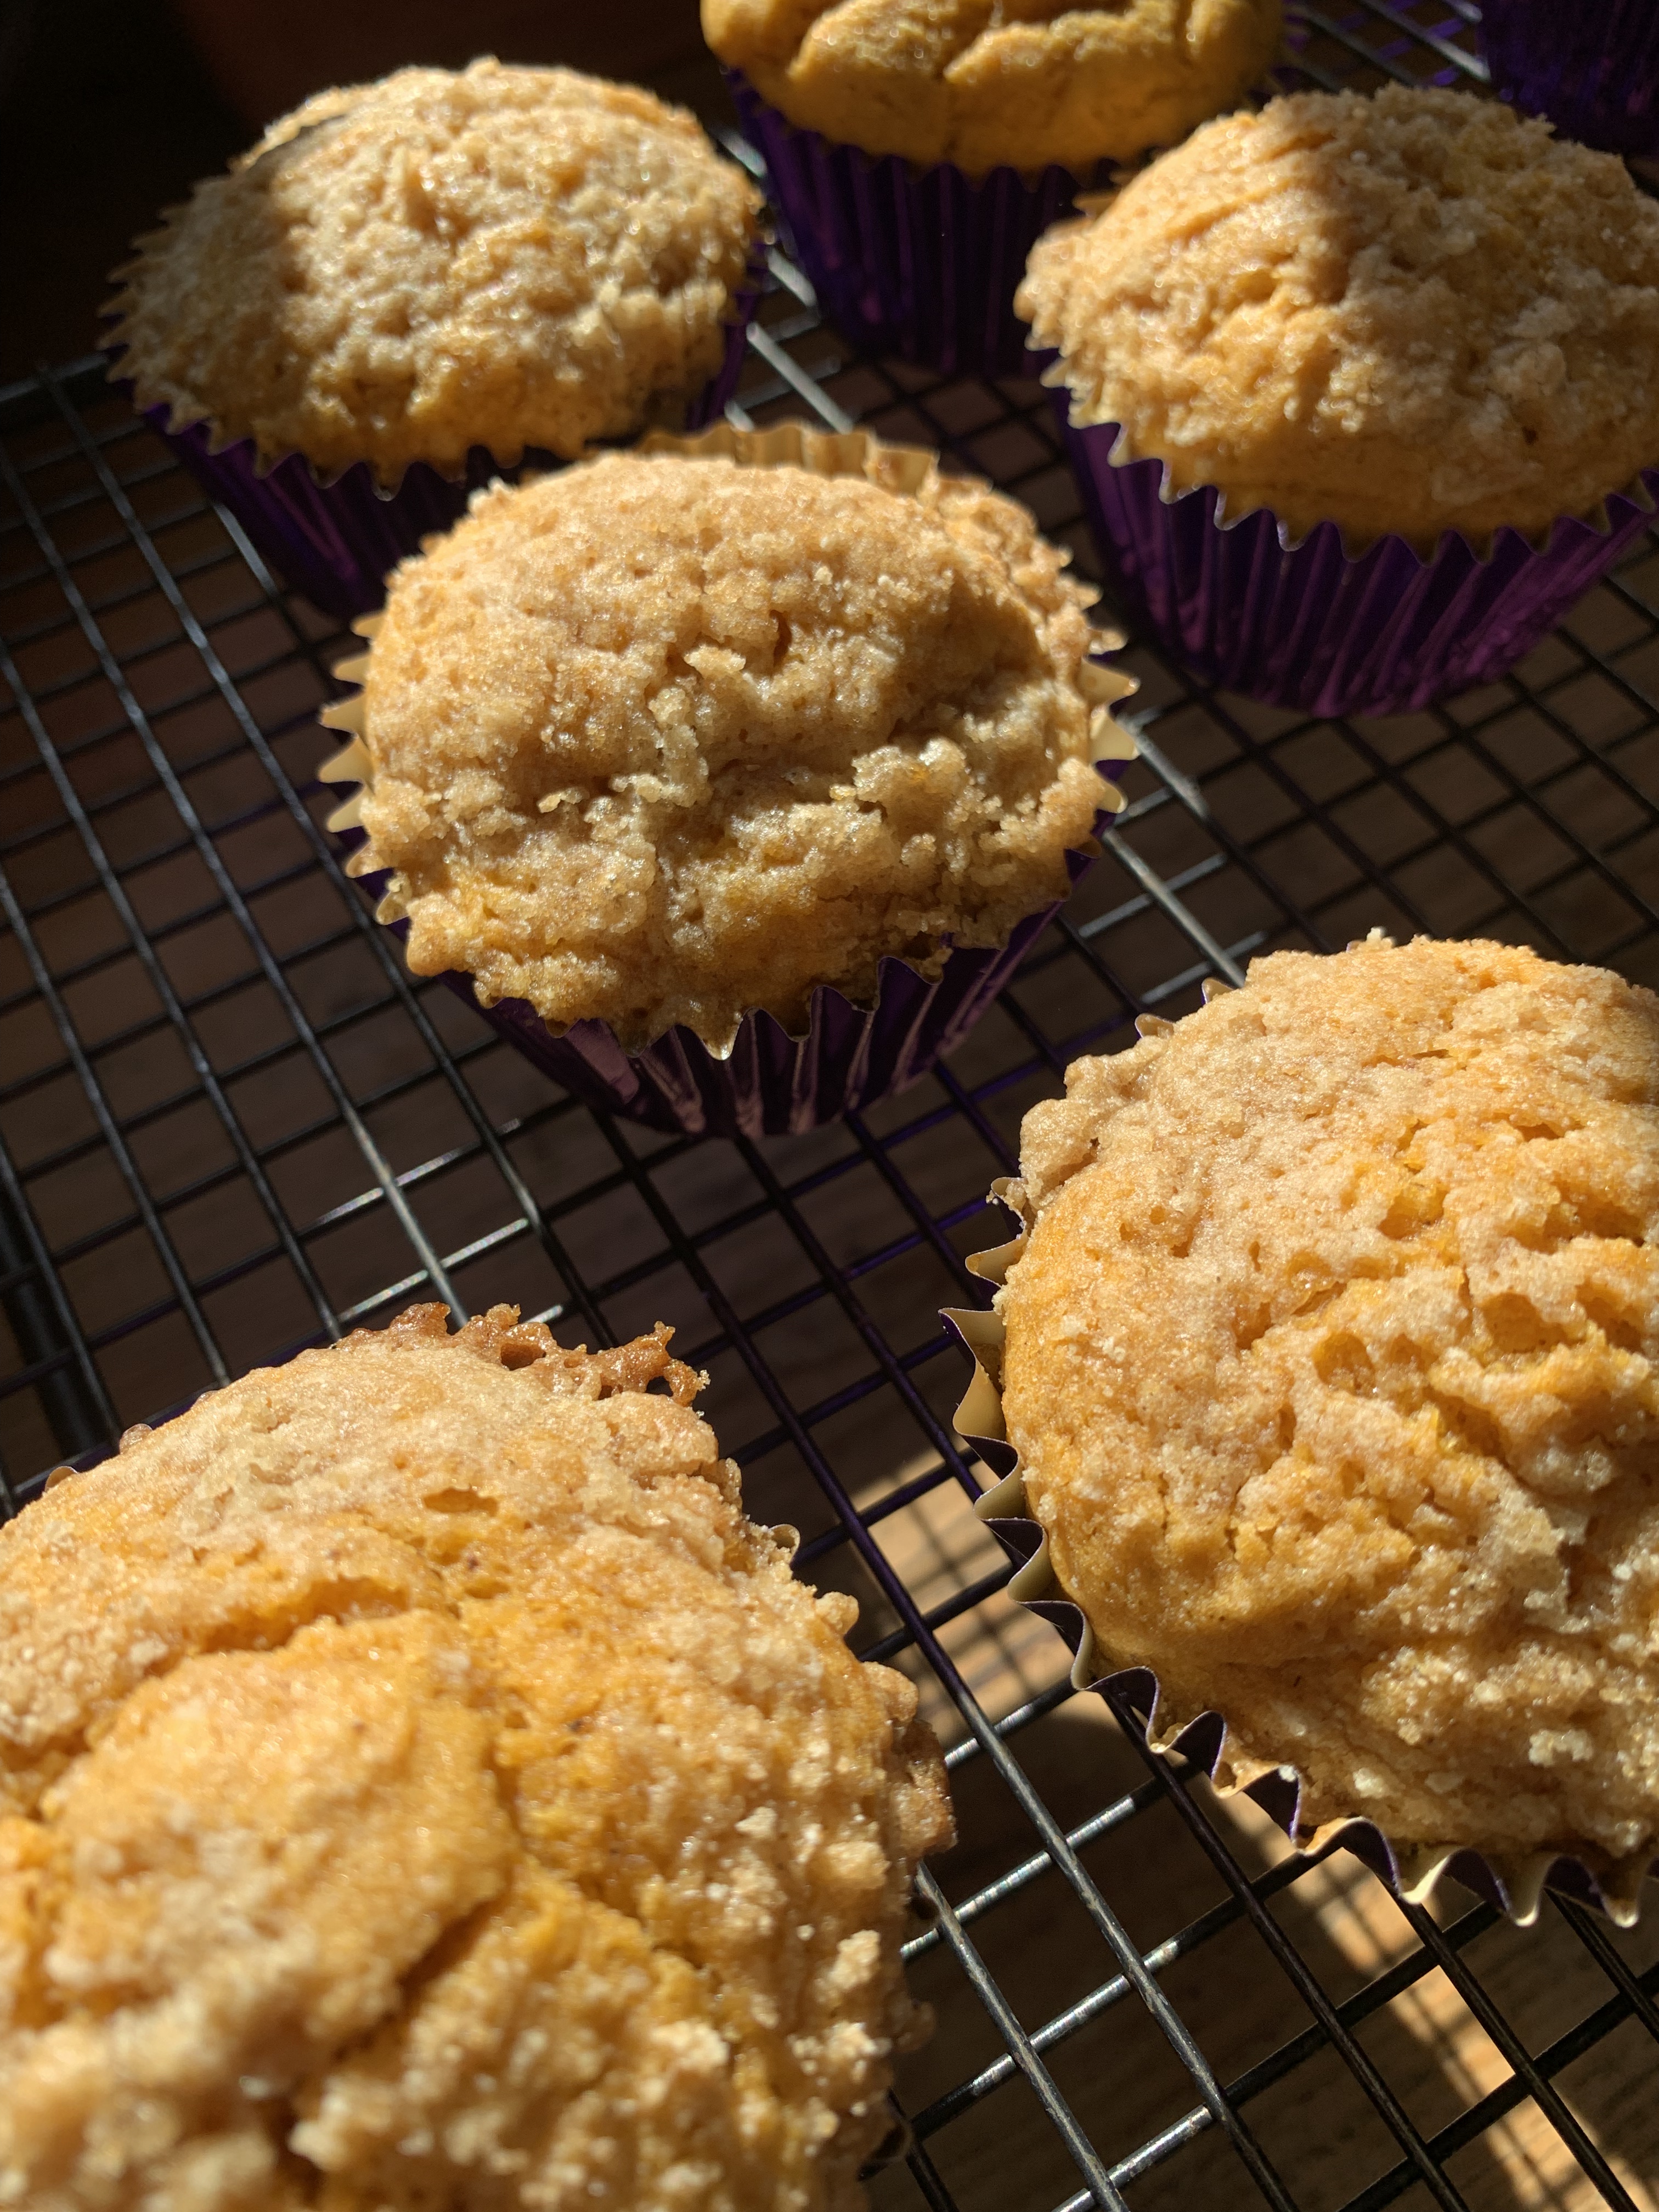
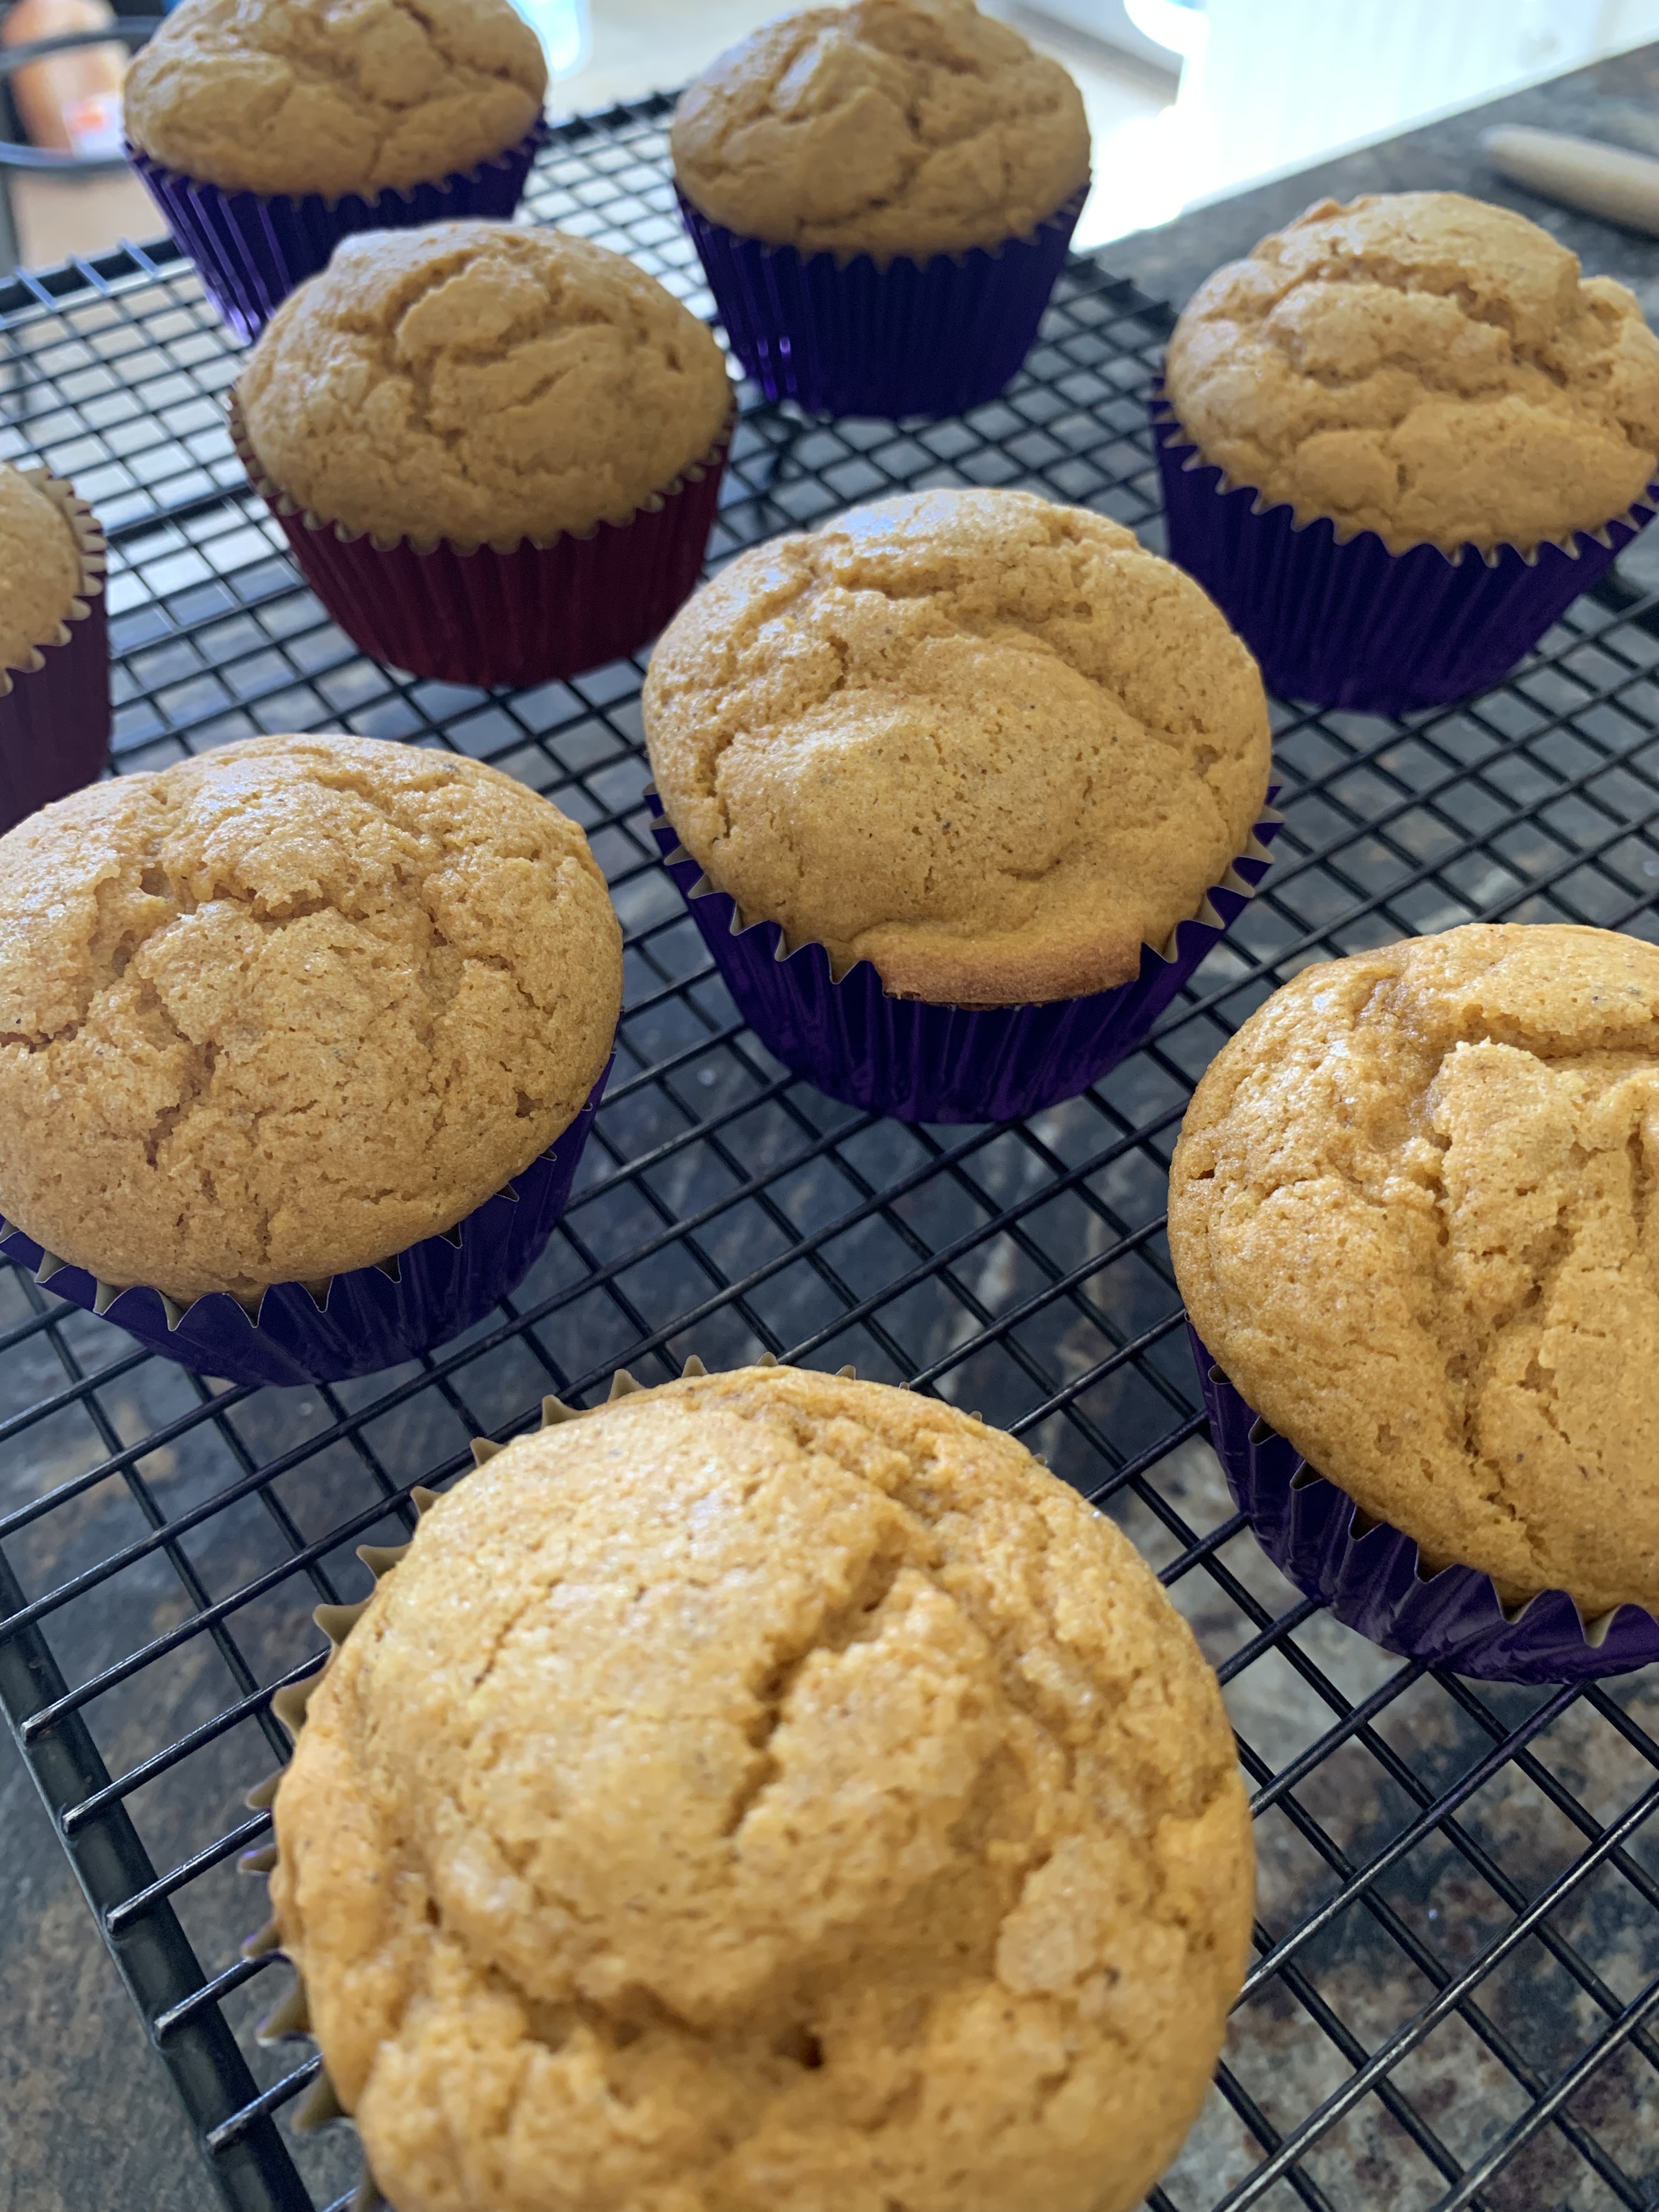
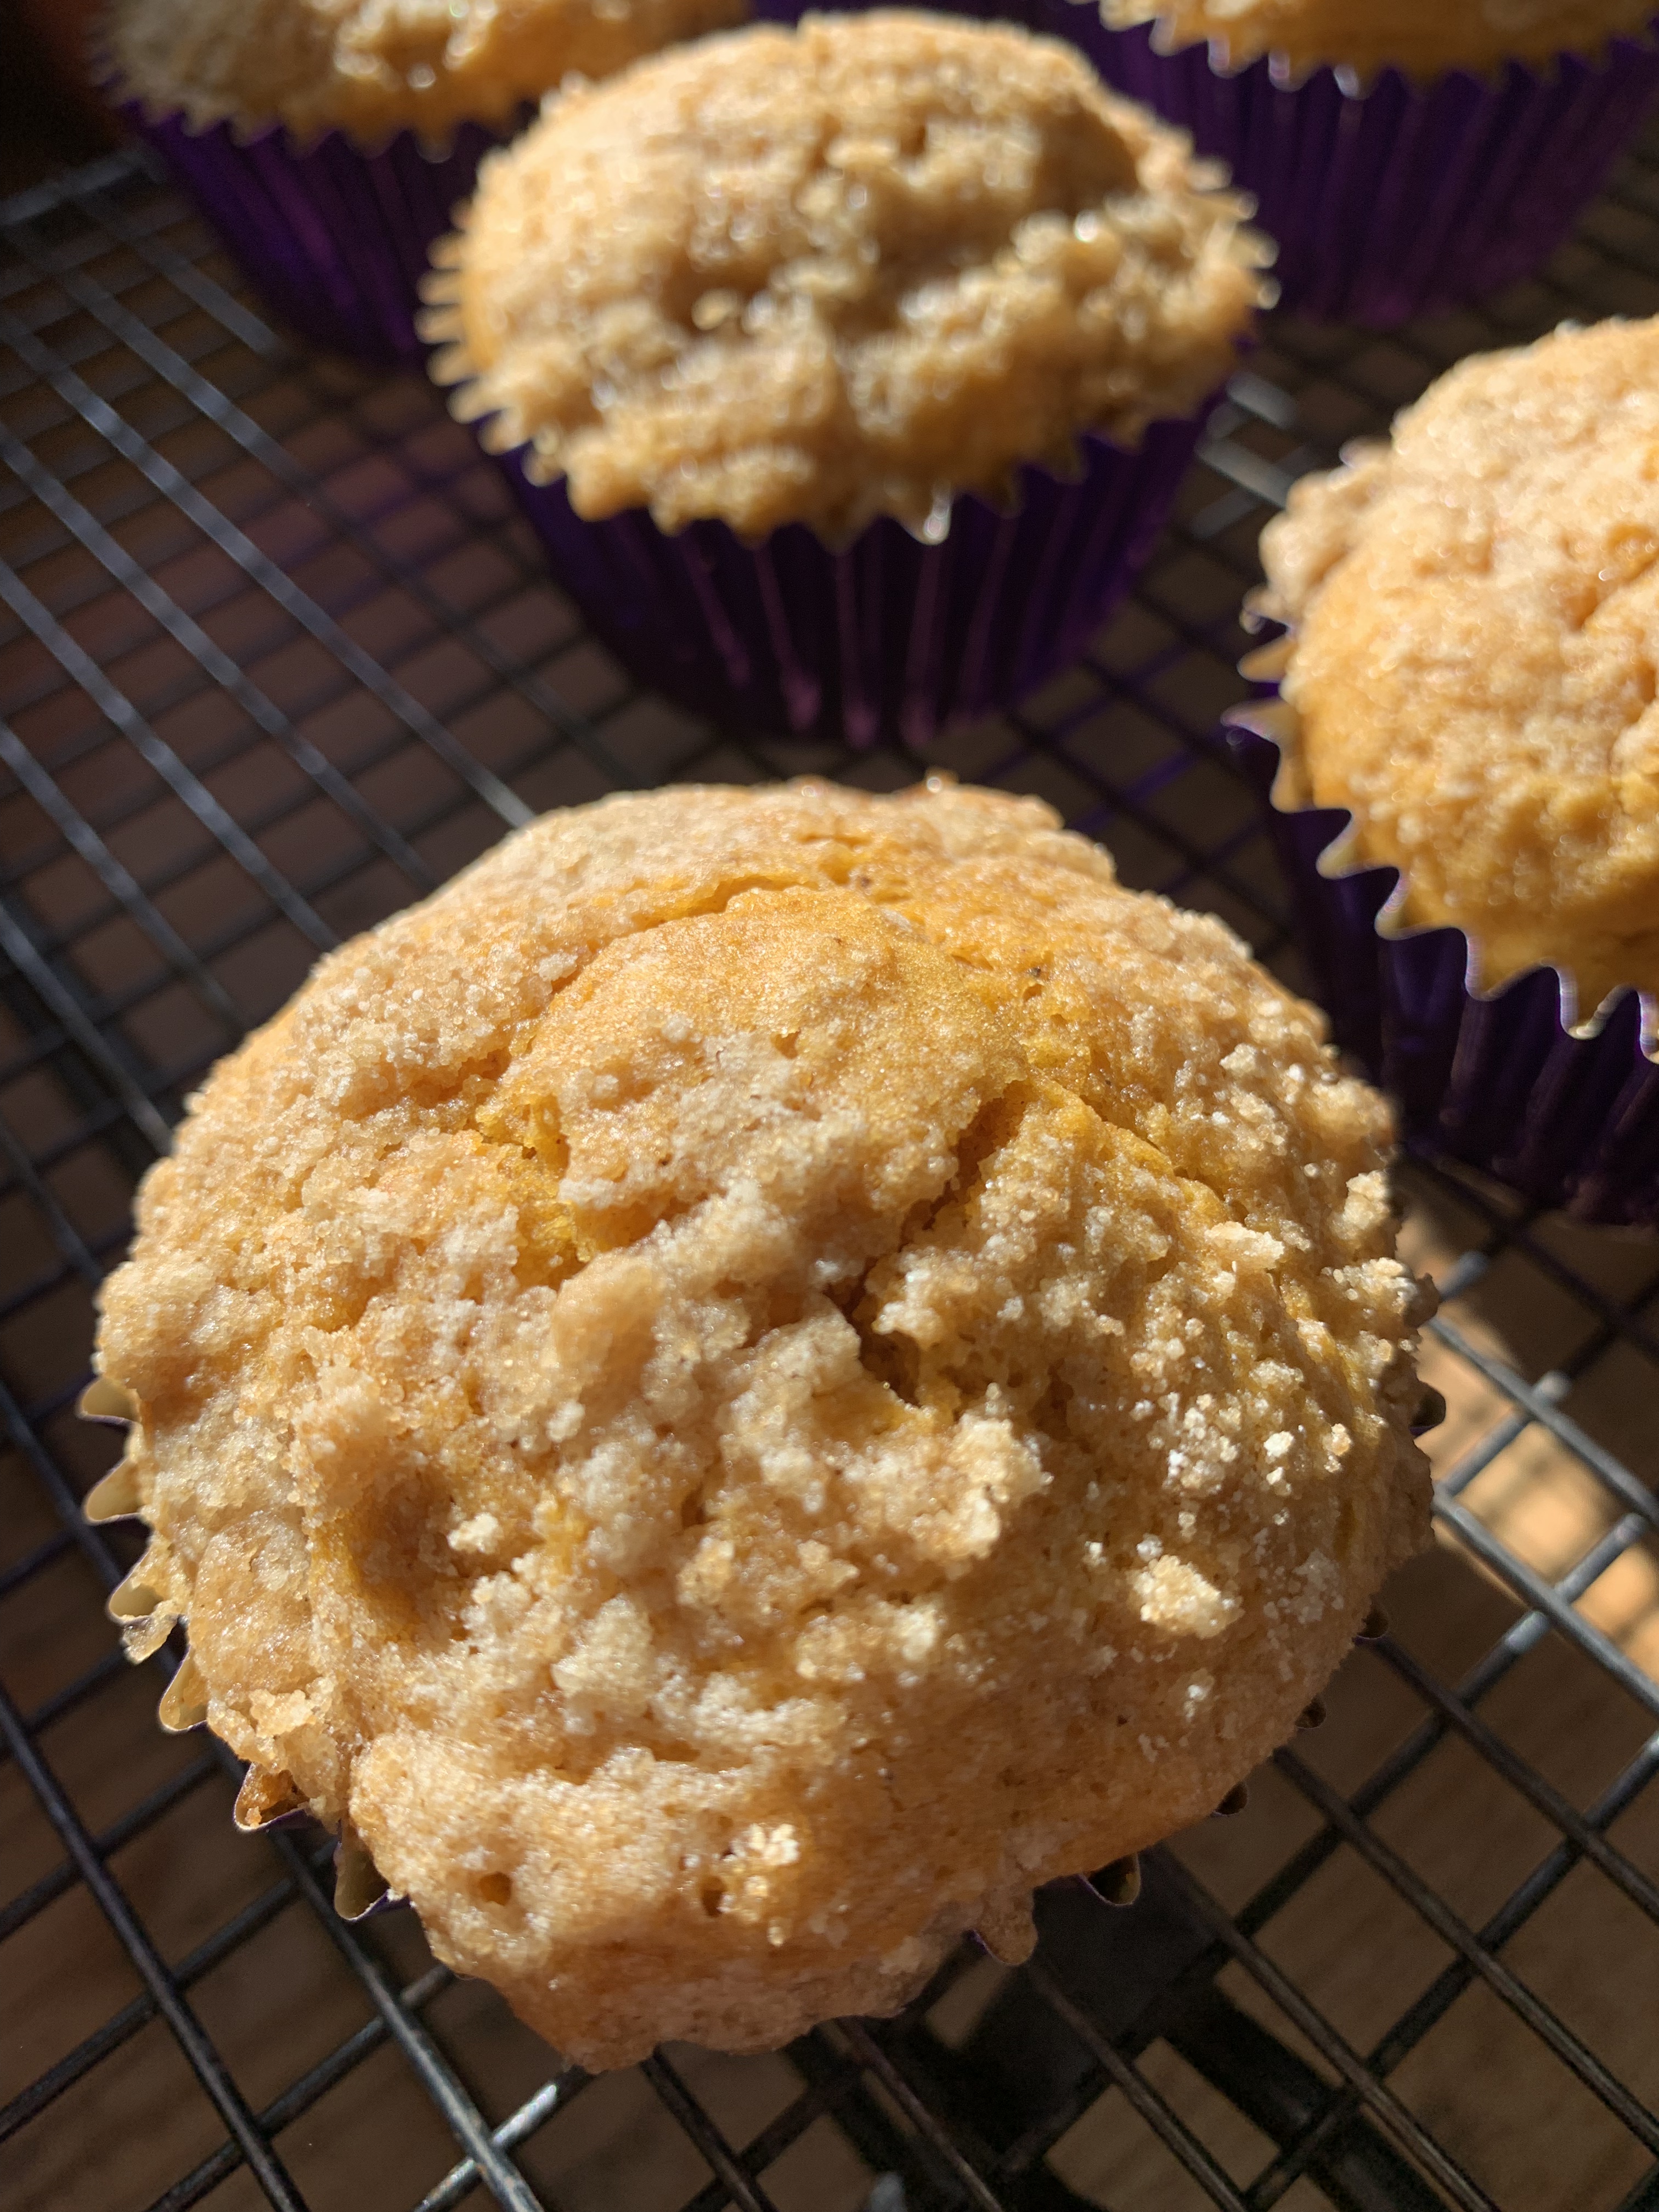
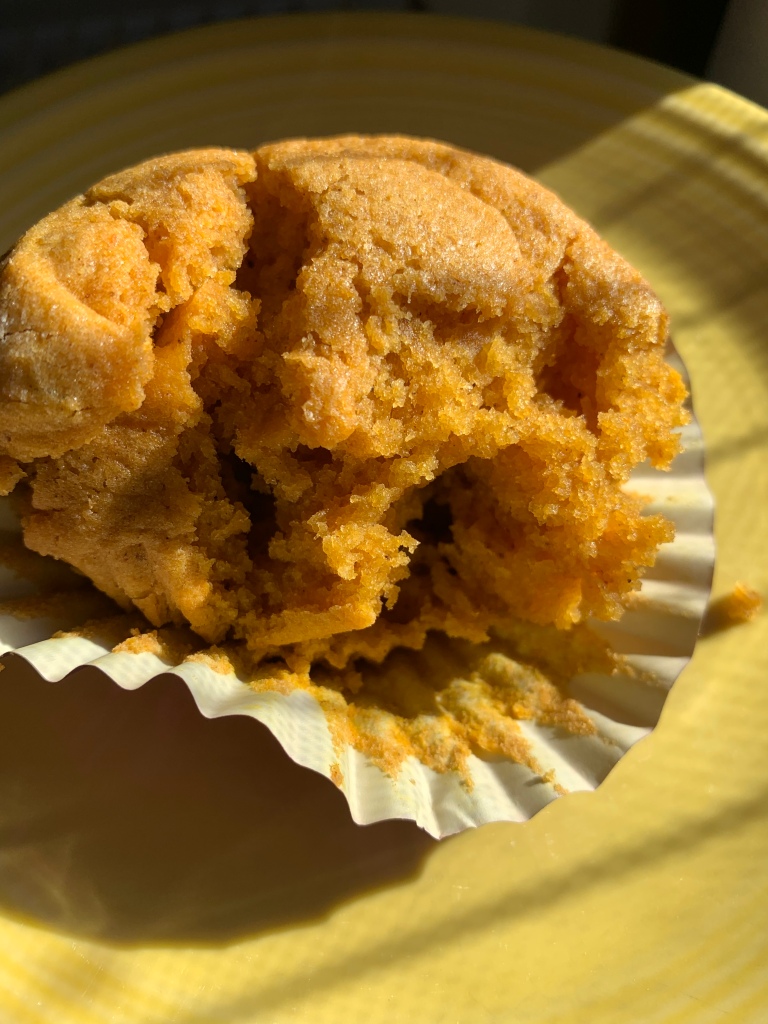
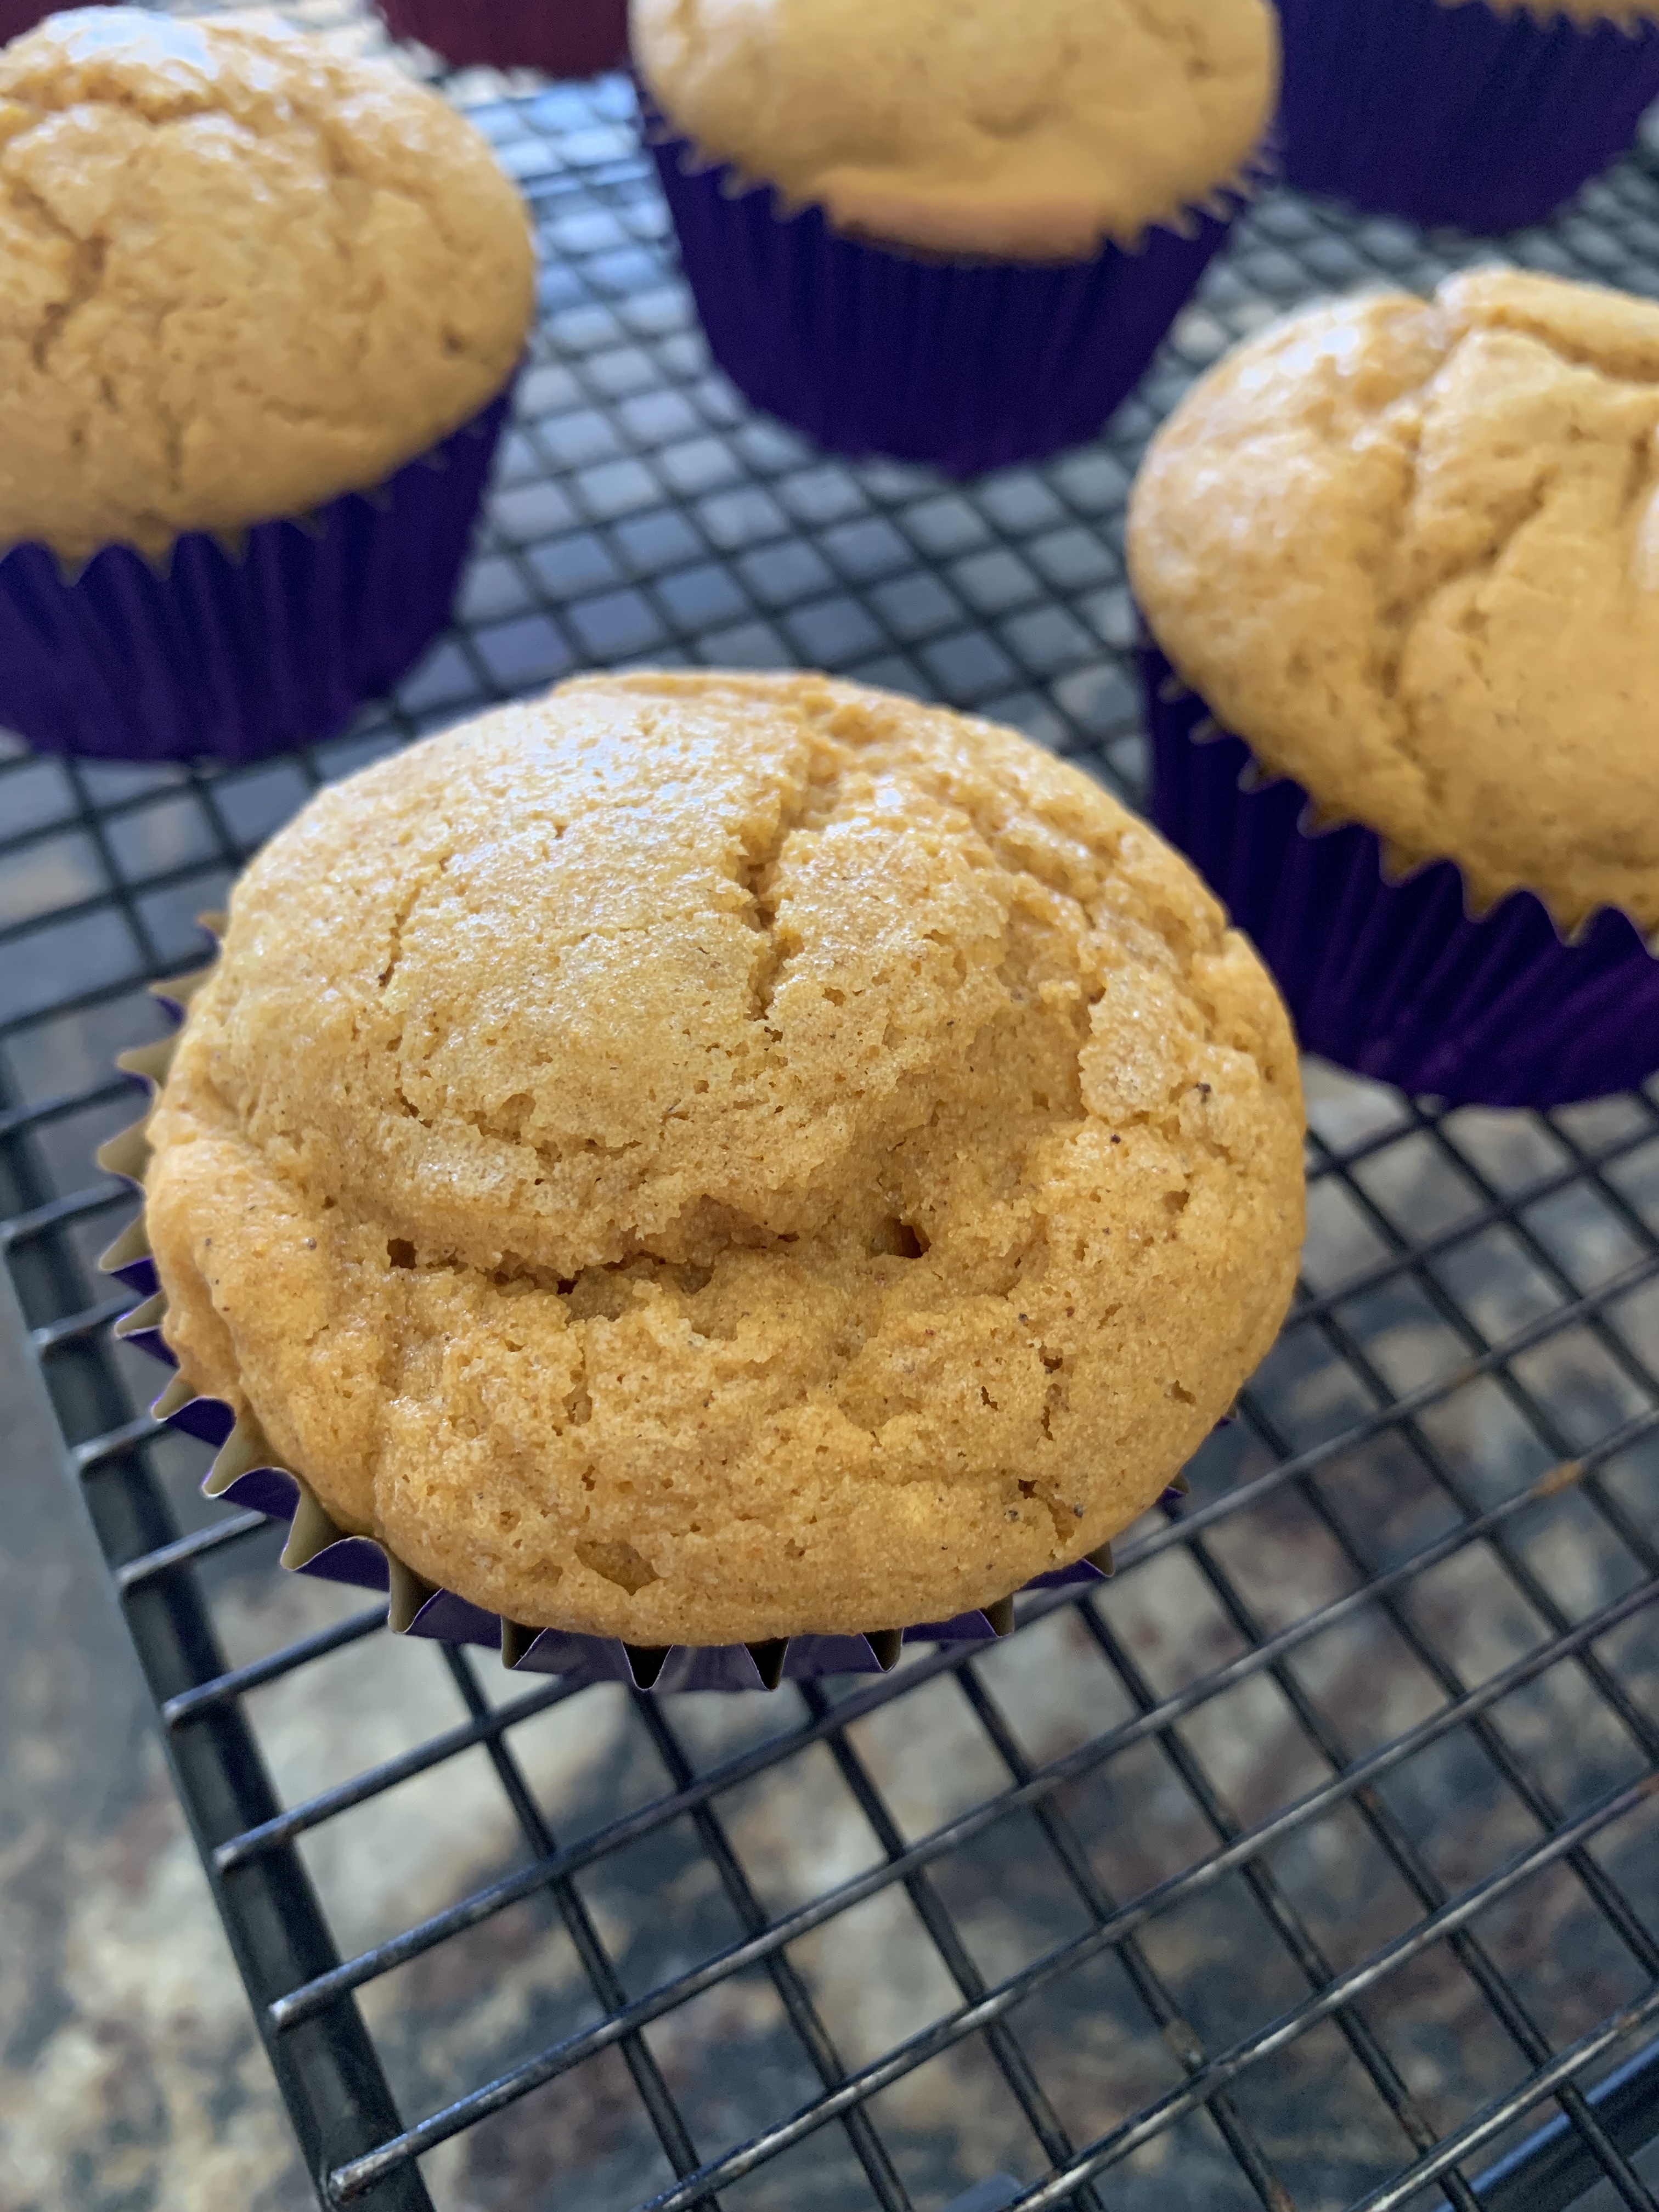
Omg. I made these today during a break between meetings and they were wonderful. Warm, soft, moist, fall-spicey, pumpkin pie in a muffin, and obviously I couldn’t decide which picture to post, so you see them with and without a streusel on top. Honestly, these don’t need a streusel, but you can do one if you’d like; otherwise, just sprinkle the top with a little sugar (like, very little, probably less than a teaspoon for a dozen muffins; the recipe makes 17-19 muffins).

In developing this recipe, I took inspiration from a recipe for Scrumptious Blueberry Muffins on the back of a bag of Bob’s Red Mill Gluten-Free 1-to-1 Baking Flour (light blue bag). The problem? I’m not really into blueberries. So I switched out the blueberries, modified quantity of pumpkin, added spices, and accidentally melted my (dairy-free) butter (oops :). The streusel is adapted from Dorie Greenspan’s Baking: From My Home to Yours. For spices, I referred to Nick Malgieri’s How to Bake from 1995, an excellent cookbook, and one of my first baking cookbooks. When I had modified a pumpkin muffin recipe from there for gluten-free, it was very good, but it was a bit dense. I saw the blueberry one on the 1-to-1 Baking Flour bag and the amount of sugar caught my eye because that was very different from the other recipe. The other ingredients were a bit different as well, but not as much as the sugar. I thought, hmmm, and well, voila.

I’m so happy I didn’t start over when I accidentally melted the butter. Normally you want to cream *softened*, not melted, butter and sugar to incorporate air and build volume so I was worried these were going to be flat as a pancake, but they weren’t! I’ve made the recipe multiple times now and had success with all.

A note on measures. If you’re weighing, don’t worry about being a few grams off with something like flour or pumpkin. My scales measure by 5 g, not by 1 or 2, and a teaspoon or 2 different isn’t going to make that big a difference. If you want to use cup measures, that’ll work, too. Just remember to loosen up the flour before scooping or spoon it in and level it off; don’t pack it down. You’ll get more consistent results with scales tho 🙂

With pumpkin, I’ve made these with 1 c (240 g) and 1-1/4 c (300 g) of pumpkin. Both work well, but I prefer the results with more pumpkin. The texture and fluffiness of the batter and resulting muffin, as well as the flavor, is better.

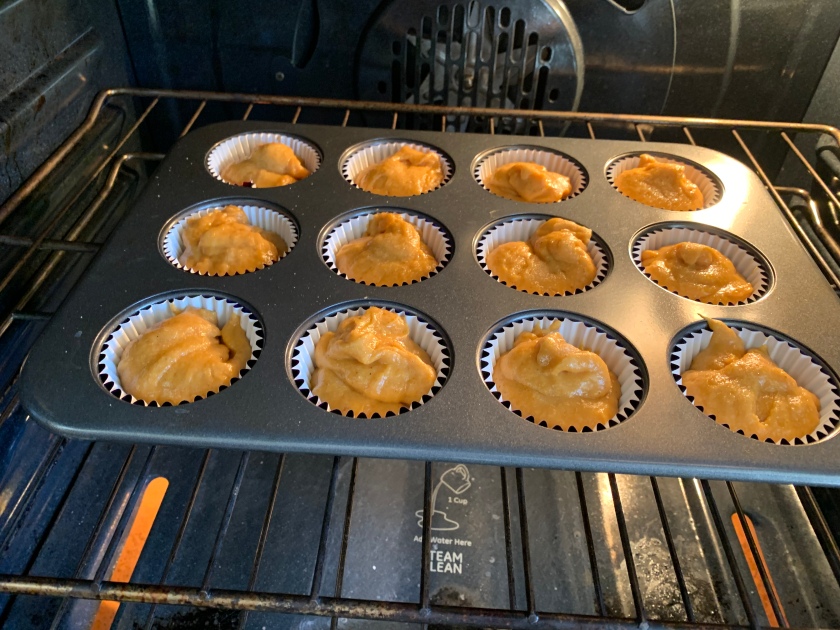
This is right after I popped them in the oven. I realized I forgot to take a picture so broke a cardinal rule of temperature maintenance and opened the door 🙂

Ingredients

  • 2 c (300 g) Bob’s Red Mill Gluten-Free 1-to-1 Baking Flour (blue bag)
  • 2 tsp baking powder (for homemade corn-free, gf substitute see note below)
  • 1/2 tsp fine salt
  • 1/2 tsp ground cinnamon
  • 1/2 tsp ground nutmeg
  • 1/4 tsp ground cloves
  • 1/2 c (1 stick, 1/4 lb, 115 g) dairy-free butter, melted and cooled (I use soy-free Earth Balance sticks.)
  • 1-1/4 c (250 g) granulated sugar
  • 2 lg eggs
  • 1/2 c (120 g) buttermilk (I use 1 tsp apple cider vinegar + unsweetened almond milk)
  • 1-1/4 c (300 g) canned pumpkin (*not* pumpkin pie mix)
  • streusel or 1.5 tsp sugar (see below for streusel info)

A note on baking powder – It’s been so long since I bought it at the store, I’m not sure if there are corn-free versions available now or not. I make mine and it’s very easy, just 1/2 tsp cream of tartar, 1/4 tsp baking soda, and 1/4 tsp tapioca starch (or potato starch or arrowroot) is equal to 1 tsp baking powder. The starch isn’t even technically needed; it’s just there to make the equivalent of 1 tsp baking powder in recipes and to keep it from clumping if you make it in larger quantities. I make it in 1/4 c. batches so I have it on hand – 2 Tbsp cream of tartar; 1 Tbsp baking soda; 1 Tbsp starch

Streusel: If you’d like to top your muffins with a streusel, mix 1/4 c. flour, 1/4 c. light brown sugar, and cut in a couple tablespoons of non-dairy butter. (Cut in the butter; don’t blend ’til smooth.)

Directions

  1. Preheat oven to 375 F.
  2. Line muffin cups with foil liners; I used 18 liners, using 1 12-muffin pan and half of another 12-muffin pan.
  3. If you haven’t already, melt a stick of dairy-free butter in a small bowl in the microwave and let cool to room temperature while you prep the rest.
  4. Whisk together flour, baking powder, salt, cinnamon, nutmeg, and cloves. Set aside.
  5. Put butter in mixer bowl and add sugar. Mix a couple of minutes ’til fluffier (I used the flat beater.), scraping down with a rubber spatula a couple of times.
  6. Add eggs 1 at a time, beating well after each addition.
  7. Add pumpkin, mix well.
  8. Add buttermilk and flour 1/2 at a time, alternatively, mixing after each addition and ending with flour.
  9. Spoon batter into muffin cups.
  10. Sprinkle with sugar or streusel.
  11. Bake 20 min. Muffins should be golden brown and tops should bounce back back if you push down lightly with your finger.
  12. Enjoy!

Hot Chocolate

Ok, super short post, but this is necessary since the weather is getting colder and it’s time for hot chocolate.

You want hot chocolate, but don’t have any mix in the house, and the good stuff is pricey anyway. Just make some yourself. Have sugar? cocoa powder? Great, that’s the basics right there. Just remember 2:1 — 2 parts sugar to 1 part cocoa. Then you can add a pinch of salt, a couple dashes of cinnamon, or whatever else you’d like. You can make up some mix and put it in a container for now and later. Then to make it, take 2 tsps of mix, 1 cup warmed milk (I use unsweetened almond milk.), maybe a squirt of vanilla extract, and you’re set.

A couple of years ago there seemed to be a dutch processed cocoa craze, but I find it limited in use and generally don’t buy it. It’s just cocoa processed with alkali, but because of the alkali it doesn’t work as well in most recipes that call for cocoa powder. Usually they’re talking about the normal stuff, not dutched. Dutched does make great hot cocoa tho, so feel free to use that here. If you’d like to learn more about dutch processed cocoa, there’s a great article here on Serious Eats: https://www.seriouseats.com/difference-dutch-process-natural-cocoa-powder-substitute.

Now, on to the recipe…

Ingredients

The first 4 are for the cocoa mix:

  • 1 c. (200 g) sugar
  • 1/2 c. (about 50 g) cocoa
  • pinch salt (optional, about 4 twists of a salt mill)
  • couple dashes cinnamon (optional, or chile, also optional, or neither)
  • 1 c. (8 oz, 240 g) milk
  • vanilla extract (optional)

Directions

  1. Warm up 1 cup milk in the microwave.
  2. Place 2 heaping teaspoons cocoa mix in your favorite hot chocolate mug. Put the rest of the cocoa mix in another container for later use.
  3. Add a little bit of the warmed milk (maybe 1/4 c? You just need enough to dissolve the mix.). Stir well.
  4. Add the rest of the milk and a squirt of vanilla if you’d like. Stir.
  5. Top with non-dairy topping, marshmallows, etc or not.
  6. Enjoy!

I know I should show a picture of a nice wide, white mug with hot chocolate and whipped cream or marshmallows, but 1) I didn’t use whipped cream, 2) it was in my Lego mug, and 3) I drank it before I got a picture. So, silly picture time. See in the instructions how I didn’t add the milk all at once? That way the cocoa mix all dissolves and stirs up smoothly. No powder glops while I was drinking or in the bottom of the mug:

Gluten-free, Dairy-free Products of Interest in the Kitchen

Remember when there was hardly any choice in flour and some items, like cream cheese (or any cheese!), were completely out?  Times they are a changing.  With “healthy”-eating trends, increased food allergies, and increased food intolerances, companies are becoming more aware of the need for products that are gluten-free, dairy-free, soy-free, etc.  It’s not just the top 8 either; you can find corn-free and others as well.  Finding the ones that work for you may still be difficult, but at least there is something to look at!

fyi, I’ll update this list periodically when I find something new or realize there’s a product I left off accidentally 🙂

Here are some that work for us:

  • butter substitute:  Soy-free Earth Balance buttery spread
  • butter substitute:  Smart Balance (now dairy-free)  This may have minimal corn-derived products, but I don’t use much of it or use it often enough to cause any noticeable problem in my son who is mostly corn-free.  (He used to have a huge intolerance to corn; now it’s still there, but a bit better.)
  • Cool Whip/Reddi Wip substitute:  Non-Dairy Reddi Wip – a cool whip/Reddi Wip substitute, available in either coconut or almond.  These are obviously not for those who can’t have the substitute, but they’re a nice option if the food-sensitive person can have one of them.  We most often see the coconut one.  Do be aware that the shelf-life, once opened, is not as long as the regular, dairy Reddi Wip.
  • cheese substitute:  Daiya shreds – too melty for pizza imho (and my oldest son’s; he prefers just leaving off the cheese), but great for manicotti or chili rellenos casserole. (I will eventually put up a new post for the chili rellenos casserole that is df, gf, etc and my manicotti recipe – yummmmmm 🙂
  • chocolate syrup:  It’s fairly easy to make your own, but Hershey’s Simply 5 is a good alternative
  • coconut cream: Thai Kitchen’s coconut cream – this is NOT the same as coconut milk.  The ingredients are coconut, water, and guar gum.  It adds a lovely creaminess *without* coconut flavor.  I’m going to try this in my pumpkin pie this year as a substitute for evaporated milk.  Works great for flan when used with unsweetened almond milk.
  • crackers: Crackers can be surprisingly difficult to make and burn easily.  I have had success tho and will post once I have a better feel for them.  Meanwhile, here are some store bought crackers to check out. Always check the ingredients and “processed on equipment” lists! 🙂
    •  Back to Nature (check ingredients; some are wheat!!  They do have some that are gf and not processed on the same equipment as wheat:  Sesame Seed and Multi-Seed are gf, df; White Cheddar are good if you can have dairy.
    • Good Thins
    • Simple Mills
    • Nut Thins are fine if you can have dairy
  • cream cheese substitute:  Daiya cream cheese! – This is great for cream cheese cookies or on toast
  • flours:
    • Bob’s Red Mill 1-1 Baking Flour – awesome.  Think sugar cookies, cakes, muffins, etc.
    • Bob’s Red Mill All-purpose Flour – An “all-purpose” flour which has beans that I still use for apple fritters and sometimes chocolate chip cookies.  It’s not as light as the 1-1 Baking Flour, but still has its place.  I use it in combination with Bob’s Red Mill 1-1 Baking Flour to make a delicious pasta.
    • rice flours:  brown rice flour, white rice flour, sweet rice flour – I use Bob’s Red Mill. I’ve heard that Authentic Foods makes a nice, very fine, brown rice flour. Bob’s Red Mill has always worked well for me
    • starches:  tapioca starch/flour, potato starch, arrowroot  (remember, potato flour is NOT the same as potato starch; potato flour is for things like gravy for Turkey at Thanksgiving). I don’t use arrowroot a lot as it is very expensive tho I did find a better price for Anthony’s Arrowroot online.
    • other flours:  almond flour, millet, sorghum, quinoa (You can buy whole and then use your blender to make flour if the price of the flour is crazy.)
  • pasta:  Jovial pasta – the best gluten-free, corn-free pasta out there (one of the few as well).  Many of the gf pastas have corn.  Others that don’t have corn have amaranth (sorry, but I don’t like licorice flavor in my pasta! egads).  Tinkyada is another that is just brown rice flour, but the texture isn’t right.  Daiya makes a mac n cheese mix that works well with the Jovial macaroni noodles.  If you can have corn, I understand there are some nice options out there.  The absolute best pasta?  homemade 🙂

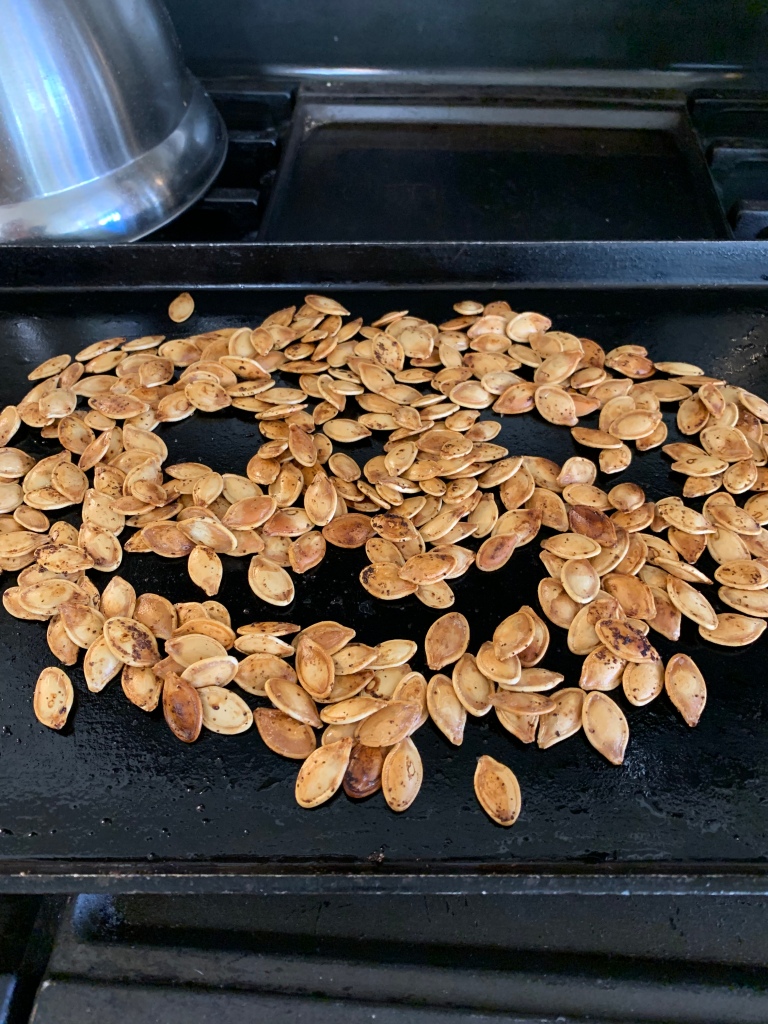
Roasted Pumpkin Seeds

These are super easy and a great snack this time of year so before you compost or bin those leftover, decorative, uncarved pumpkins from Halloween, cut ’em open and save some of those seeds! These can be seasoned with your favorite herb or spice in the kitchen. I love garlic so this time I used garlic powder. The hardest part of this recipe is getting the seeds from the pumpkin 🙂

Ingredients

  • 1 c. pumpkin seeds
  • olive oil
  • salt
  • seasoning (your choice. Some ideas are garlic powder, chile powder, rosemary, etc.)

Directions

  1. Preheat oven to 350F (180C).
  2. Rinse pumpkin seeds, pulling out remaining bits of pumpkin, and pat dry.
  3. Spread the seeds on a griddle pan or cookie sheet.
  4. Drizzle with olive oil.
  5. Use salt mill or fingers to generously sprinkle with salt.
  6. Sprinkle generously with garlic powder or your choice of seasoning.
  7. Use your fingers to mix up the seeds with the olive oil and seasonings; shake gently to even out the layer of seeds on the griddle pan.
  8. Bake for 25 min; stir; bake 5 min more.
  9. Enjoy!

Ramblings on “Allergy Free” Baking and Gluten-Free “All Purpose” Flour

Update:

I was rereading this post from 7 years ago (!) and realized that very little has changed regarding gluten-free (gf) flours.  This is definitely worth a read imho if you’d like to learn about gf flours.  In some ways, so many things have changed.  There are many more gf products in the store than there was then and people are more aware of food issues than before.  If you’re doing your own baking tho, the flours to choose from are largely the same and all-purpose is still not truly for all purposes.  I still use brown rice flour, white rice flour, sweet rice flour, quinoa, sorghum, tapioca starch, potato starch, arrowroot, almond flour [tortillas! and chocolate chip cookies (NY Times gigantic, amazing cookies https://cooking.nytimes.com/recipes/1020871-gluten-free-chocolate-chip-cookies%5D, and occasionally millet.  For mixes, I use Bob’s Red Mill 1 to 1 Baking Flour (light blue bag) and Bob’s Red Mill All-purpose Baking Flour (reddish-brown/green/yellow bag).  Occasionally I use Pamela’s, but I don’t buy Bella at all any more.  I do make graham crackers, but I don’t use Teff.

The original post from Nov, 2014:

Those trying to address food allergies/intolerances in the kitchen see a couple of things frequently that I think everyone should be aware of the associated caveats that go with them — “Allergy Free” recipes and “Gluten-Free All Purpose” flour or baking mix.

“Allergy-Free”

There is no such thing as being allergy-free for everyone.  My oldest son is gluten-free and corn-free.  His is also mostly soy-free, dairy-free, and beef-free, with small exceptions for these last three.  His fish has to be wild, not farmed (they’re fed corn and soy and he can tell it by the increase in pain).  His chicken _can’t_ be organic (same issue as farmed fish) and he does ok with rice flour and can even have rice in small amounts now.  He couldn’t have it for a while, nor eggs and bananas.  Yet even with all of this, I would end up making stuff that other people couldn’t have (my son _can_ have nuts!).

Many recipe books assume corn is ok because they’ve addressed the big 8 allergies.  Nope.  Even Enjoy Life has corn in a few things. Just everyone, please be aware of what you’re putting in the food you make and what’s in the food you eat.

“All-Purpose” flour/baking mix

Gluten-free flours fall into about 4 categories — nut flours, bean flours, starches [white rice flour (fyi, I never use white rice flour, just brown) and corn, tapioca, potato, arrowroot and any other ‘starch’ flour I’m forgetting], and other flours (some call whole grain, but that’s a bit misleading).

I wish there were truly an all-purpose flour out there.  Even in wheat flour, all-purpose is ok, but not truly all-purpose.  Hence the reason I used to have all-purpose flour, pastry flour, bread flour, white whole wheat flour, etc.  Now?  I have brown rice flour, quinoa flour, sorghum flour, tapioca starch, potato starch, Bob’s Red Mill all-purpose flour, Bella’s all-purpose baking mix, and Pamela’s baking and pancake mix (she also makes a ton of other mixes by the way, including those for many baked goods!).  Apparently, I’ll need to add Teff to my inventory if I want to start making graham-like crackers.  There are other blends for sale such as Hodgson’s Mill, Better Batter, and Cup 4 Cup.  I’ve heard great things about c4c, but their original blend has ingredients my son can’t have (corn, dairy) and the other is a “whole-grain” style that I wouldn’t get as much use out of.  Hodgson Mill had amaranth flour, not my favorite (liquorice aftertaste… 😦 ).

What you really want to consider is what you would like to use the flour for and does the “all-purpose” mix fit your needs.  Some of it is a matter of taste and you will probably have to do some trial and error.  If you don’t like bean flours, you won’t want to use Bob’s Red Mill’s all-purpose flour probably.  But may I urge you to give it a try???  I use this for apple fritters (incredible) and chocolate chip cookies.  I’ve also used it for pizza crust, tho I prefer using a mix that I put together instead.  All-purpose flours with bean flour will give you a earthier taste.  I started to say heavy, but the fritters are most definitely light and yummy.  I’ll post those eventually.

If your all-purpose flour has starches (especially potato starch) and milk powders, it will be a lighter mix, good for something like banana bread and cookies.  Watch to see if there is salt or xanthum gum already in the mix. If there is, you don’t want to add more!  It will either turn out gummy or taste like salt.  Not good.

All-purpose “whole-grain” mixes probably won’t have starches and will lead to denser products; think whole wheat bread.

Another alternative is to simply make your own mix.  It could be as simple as 1/2 brown rice flour, 1/2 tapioca starch, or much more complex.  In general, I would start with 1/2 starches and 1/2 other “whole grain” kinds (by weight if possible).  There was a huge movement looking at ratios where some were concluding 40% starches and 60% other, but that really depends on your elevation, humidity, and taste.  Start with 50/50 and go from there.  If it’s too gummy, try less starches next time.  If it’s too heavy, try more!

Eventually you may want to add nut flours, including coconut, but bear in mind coconut flour absorbs huge amounts of liquid.

Personally, I make my own mix sometimes and use a store-bought one other times, depending largely on how fast I need it.  I do like Bella’s for an excellent pie crust tho.

New Beginnings

Hi all! Well, I made my first gluten-free, dairy-free, egg-free, corn-free (almost) chocolate chip cookie from scratch yesterday! And the miraculous thing??? It was actually good!! Many thanks to Adventures of a Gluten-Free Mom for the recipe which I only slightly modified. She used baking powder, which has cornstarch, so I used 1/2 tsp baking soda and 1/4 tsp cream of tartar instead of a tsp of baking powder. I also used crisco buttery stick because it was the closest I could find to a corn-free, butter flavored baking stick to use. Even then it’s possible that the “flavoring” has corn, but it worked for my son so I’m ok with it for a first try. It was a 4 on a scale of 1-10 on his stomach. My goal is all 1s and 2s, but since he was ok with a 4, well, so was I 🙂

My son’s head and stomach pains are still there, but much reduced, since he started his elimination diet. We’re trying to add some foods back in, with mixed success. it’s going to be a long road, but I’m very hopeful.

I’m going to start baking again. It’s like learning to bake all over again. So far I’ve learned I need xanthum gum or something similar to help replace the gluten that is not in the flours I’m using. Based on these cookies, I’m guessing that rice flour is about as close as I’m going to get to all-purpose flour. Sorghum is used to give a sweeter (nuttier?) taste to bake goods, and tapioca flour (also called tapioca starch) is great for tenderizing. There’s more, but I’ll save that for later.

Around the World-wise, I expect these meals to resume in a month or so, when I’ve done a little more research and when finances are on a better footing (I’m job interviewing!).

Hope everyone is well and I’ll see you here again soon. I’ll post pics of the choc chip cookies when I get pics up.

Take care!

A Solar Oven and and Learning to Bake


Hi all,

So this is my oldest son with his solar oven homework.

Take a pizza box and glue foil along the bottom and sides.  Lay black construction paper in the bottom.  Cut a top flap that is an inch smaller than the top of the pizza box.  Glue foil to the top flap. Tape plastic wrap over the opening with masking tape.  Be sure to tape all four edges.

Remember how a pizza box closes?  The front flap you see actually opens for food to slide in and out of the oven.  Tape a short piece of string to the top (about 12″) so that you can tape the other end of the string to a table or whatever the oven is sitting on so that you can hold the flap open at an angle while the food cooks.

Ok.  So, do you see the s’mores in the box?  They should have been topped with another graham cracker and wrapped with foil before putting in the oven according to his teacher, but this actually worked fine.  You do need to leave them out most of the day tho.

The other thing about the s’mores in the box?  My son can’t actually have those, not the marshmallow, the chocolate, nor the graham cracker.  He also can’t have gluten, corn, oats, or many other things right now because he’s on what’s called an elimination diet.  You remove all potential food allergens or irritants to allow the gut to reset and be happy.  For six months now, his head and stomach have been in constant pain.  Yes, even in the picture; he’s learned to hide it.  No 10 yo should have to do that.  (btw, his hair is long ’cause he grows it for locks of love.  That and he likes long hair :).

When the pain is gone, or between 4 and 6 weeks if it doesn’t go away, we will start adding back in, one by one, all of the foods we’ve dropped so that we can determine which ones are problems.  We did find out yesterday that there is a possibility they missed Crohns in the small bowel, but we’re also fairly sure he has food intolerances.  Gluten is one (he was off for three weeks and then back on and was worse when he was back on; we went through this twice so it’s fairly clear.  lactose is also a problem currently).  There may be others, but right now all food irritates him so we’ve got to get his gut cleared up if possible.

Why am I telling you all of this?  For one thing, it’s ’cause I know some of you have been kind enough to follow this blog or check in now and then to see what’s new and there hasn’t been anything.  For another thing, I may well need to learn to bake again, without who knows what. Gluten, corn [think about it; it’s in everything (vanilla – corn based alcohol; confec sugar – corn starch; baking powder – corn starch (tho you can make your own w/o); even xanthum gum, used in a lot of gluten-free cooking, can be derived from corn)] , etc.

We will eventually get back to our around the world dinners and I’ll eventually bake again, but I won’t be posting to the blog regularly for a while.  We may well end up eating a whole lot healthier after this and actually like it! 🙂  We shall see.  But change, we must.  My baby needs to be pain-free if at all possible.

Thank you for stopping in and be sure to subscribe so you’ll get new posts when I do start back up.  I still have to post Burkina Faso and Cambodia!  🙂